Learn how to seamlessly integrate Facebook Login into your Laravel application for secure authentication. This guide covers step-by-step implementation, including setting up credentials, configuring OAuth, and handling user authentication efficiently.
Step 1 : Get Credentials
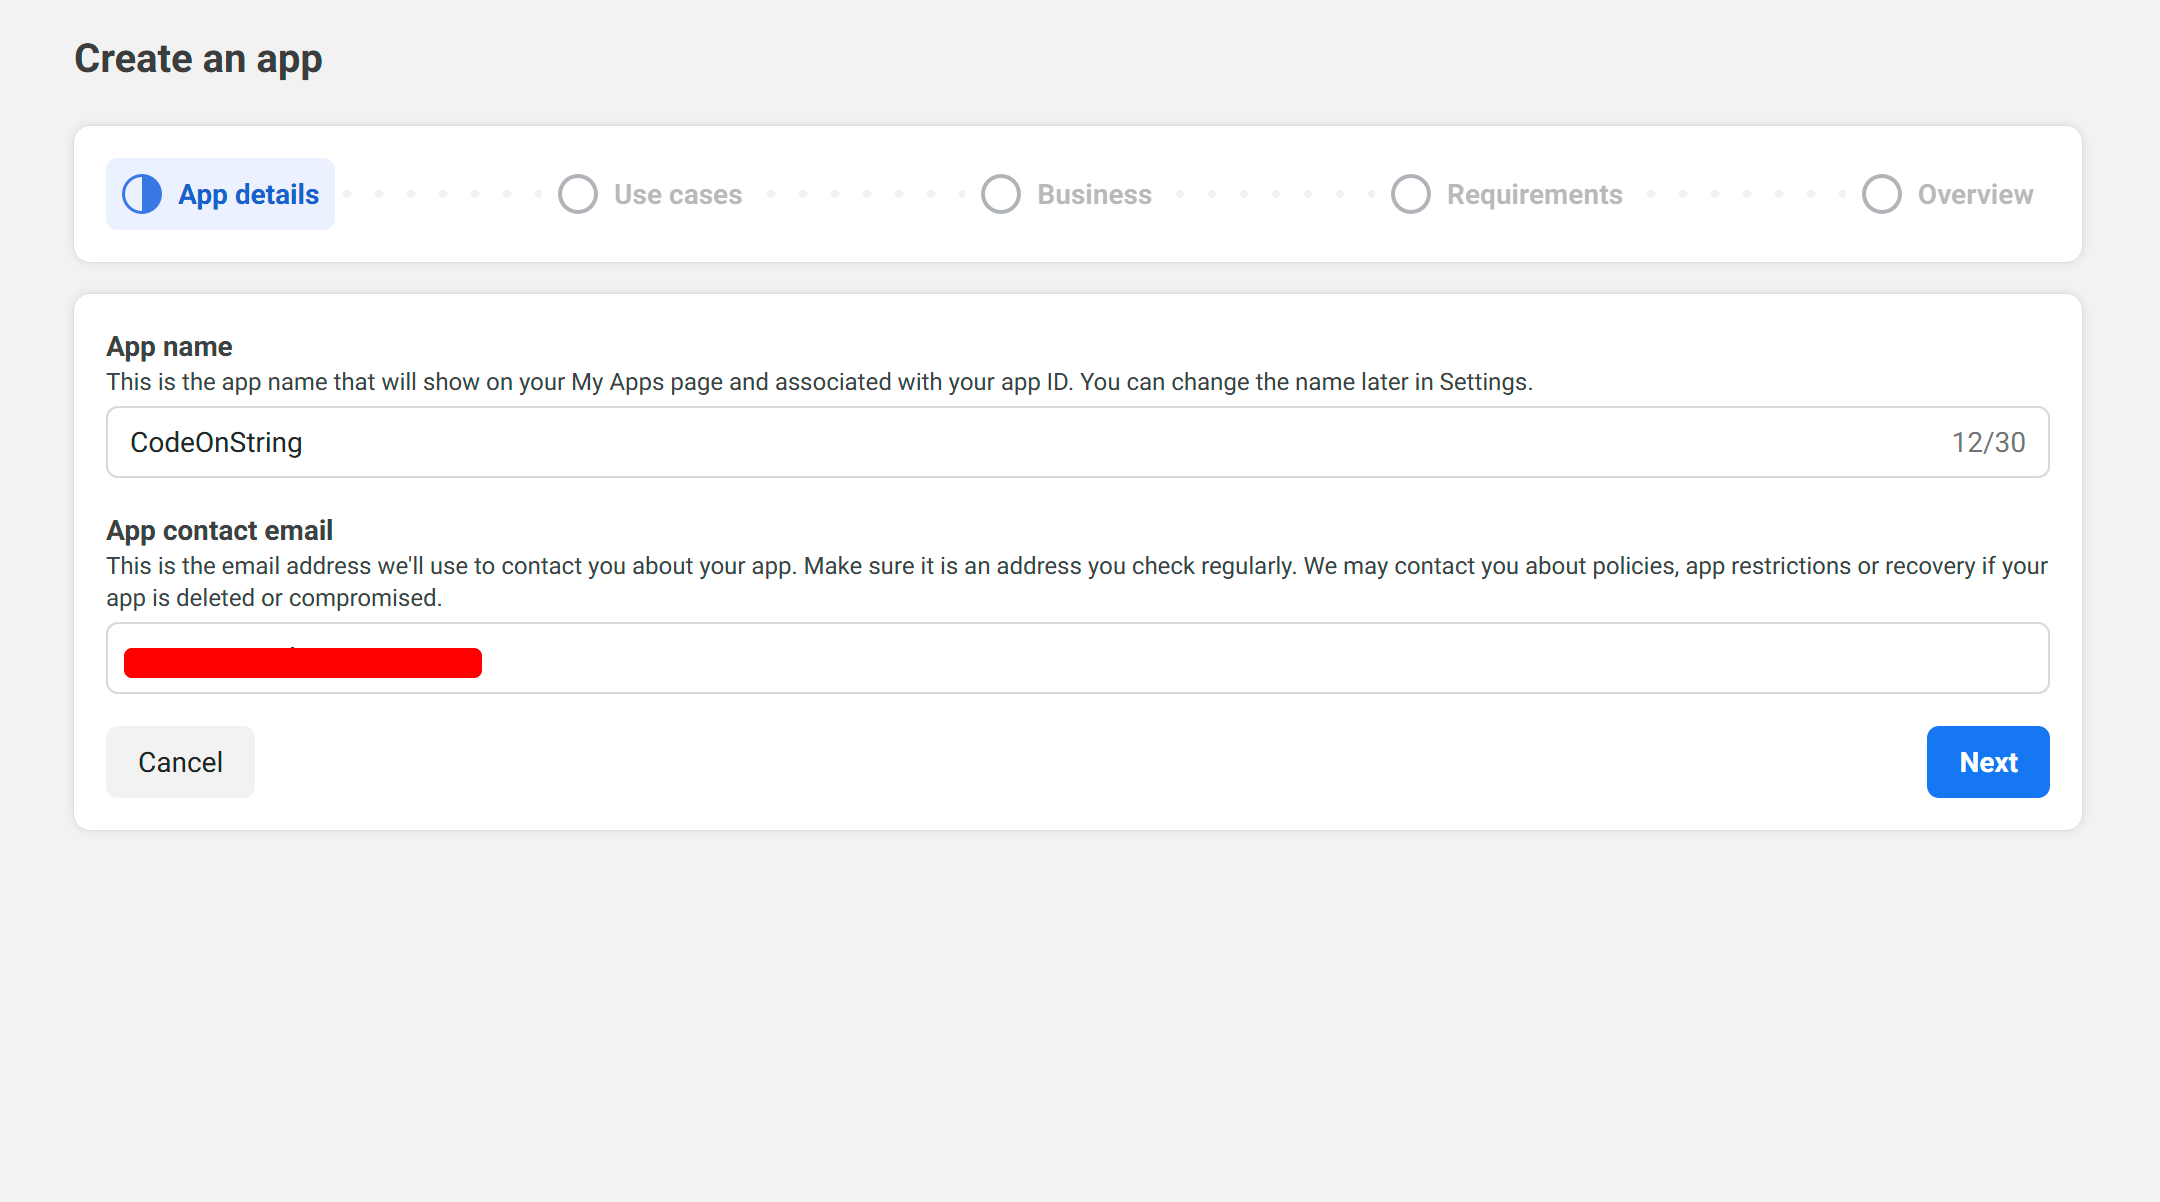
At this stage, you'll need a Facebook App ID and Secret Key to configure Facebook login. You can obtain these credentials from the Facebook Developers Console. https://developers.facebook.com/
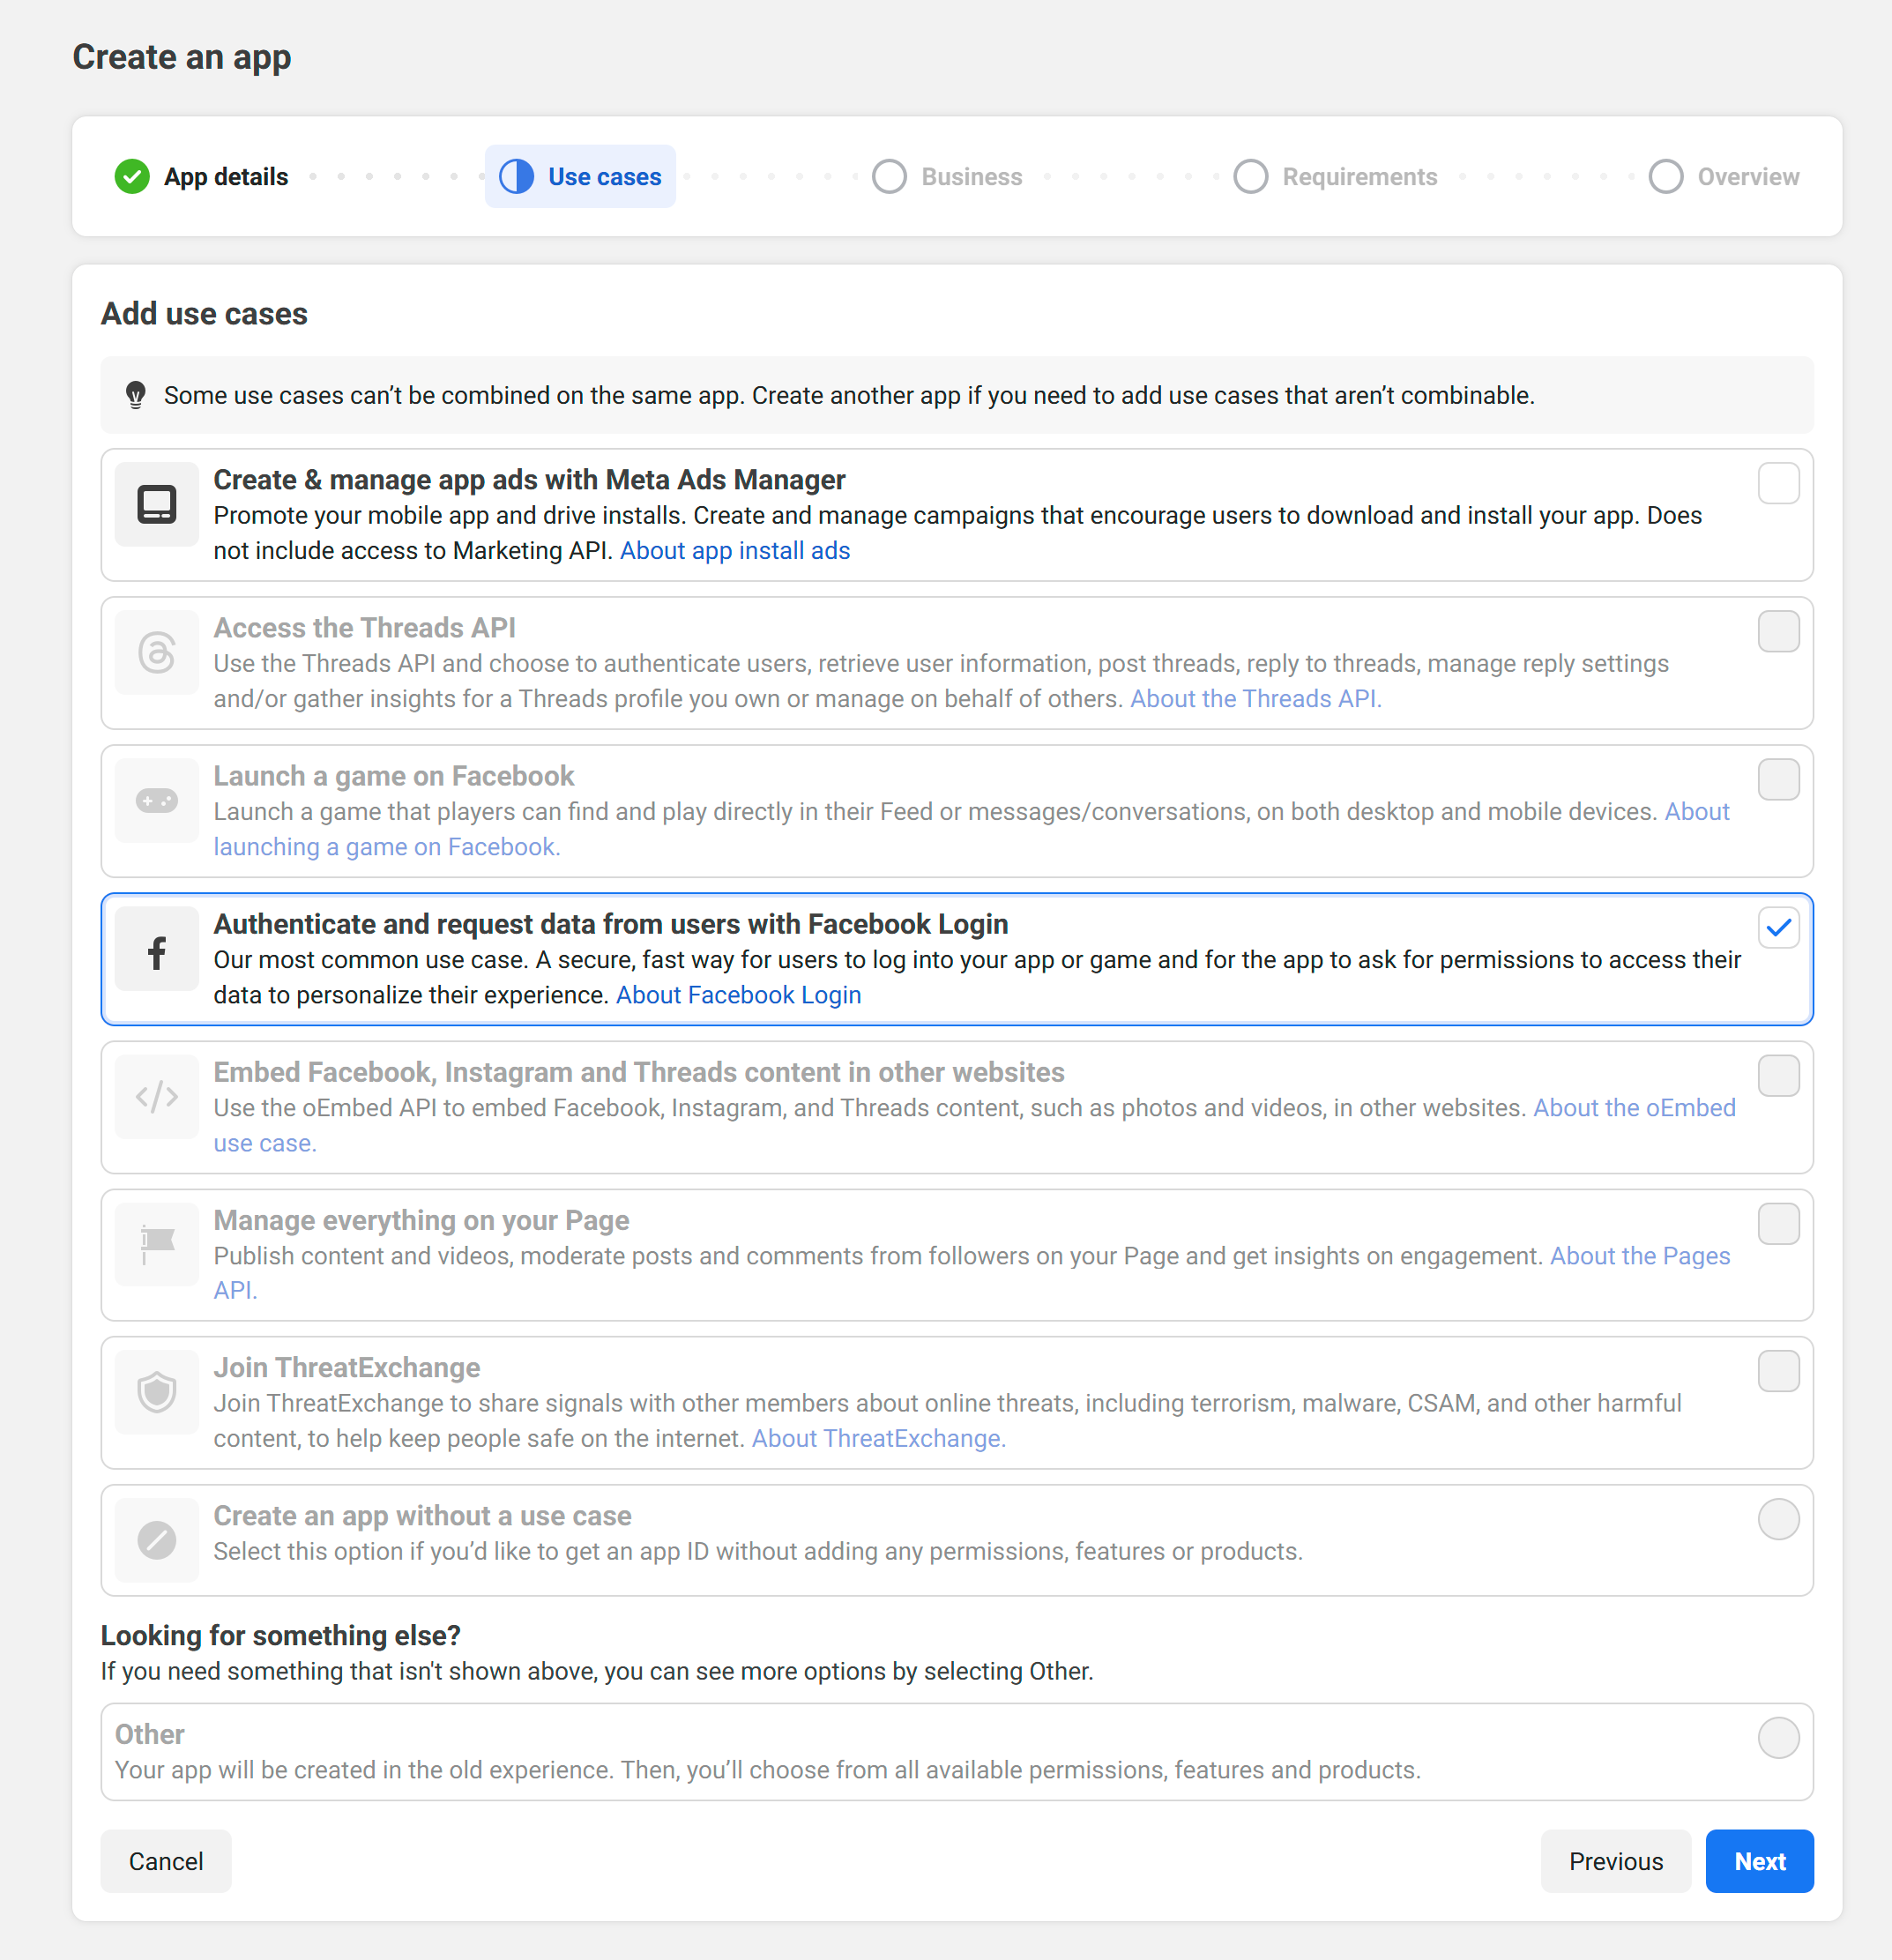
Select Usage
If you have setup business portfolio, You can connect it to that, Else Skip it.

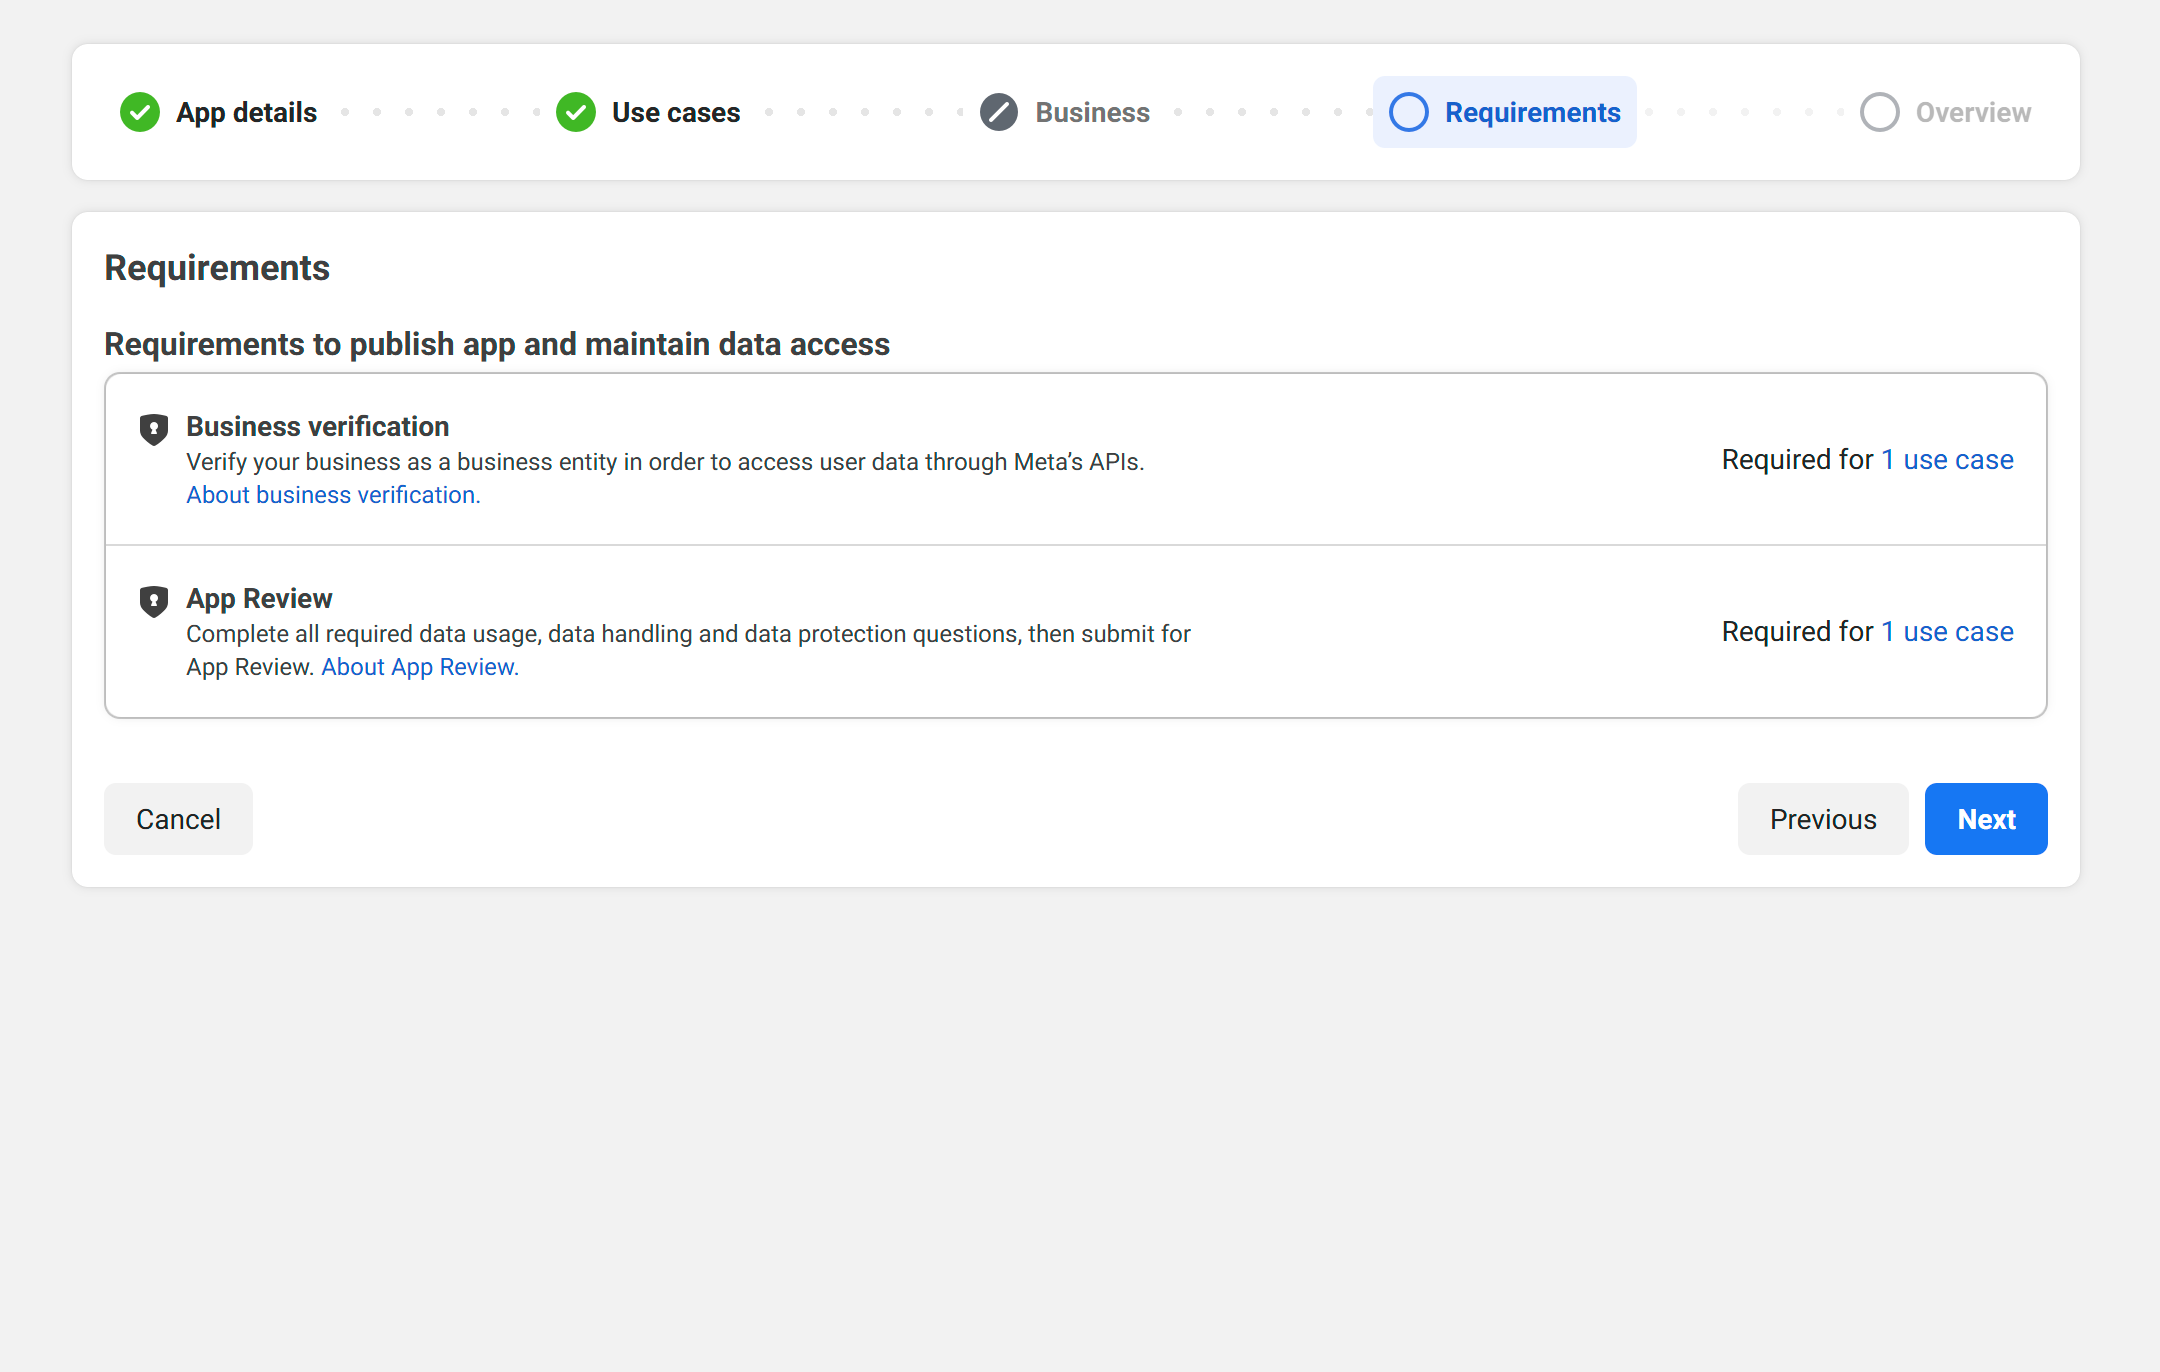
Business verification for production mode.
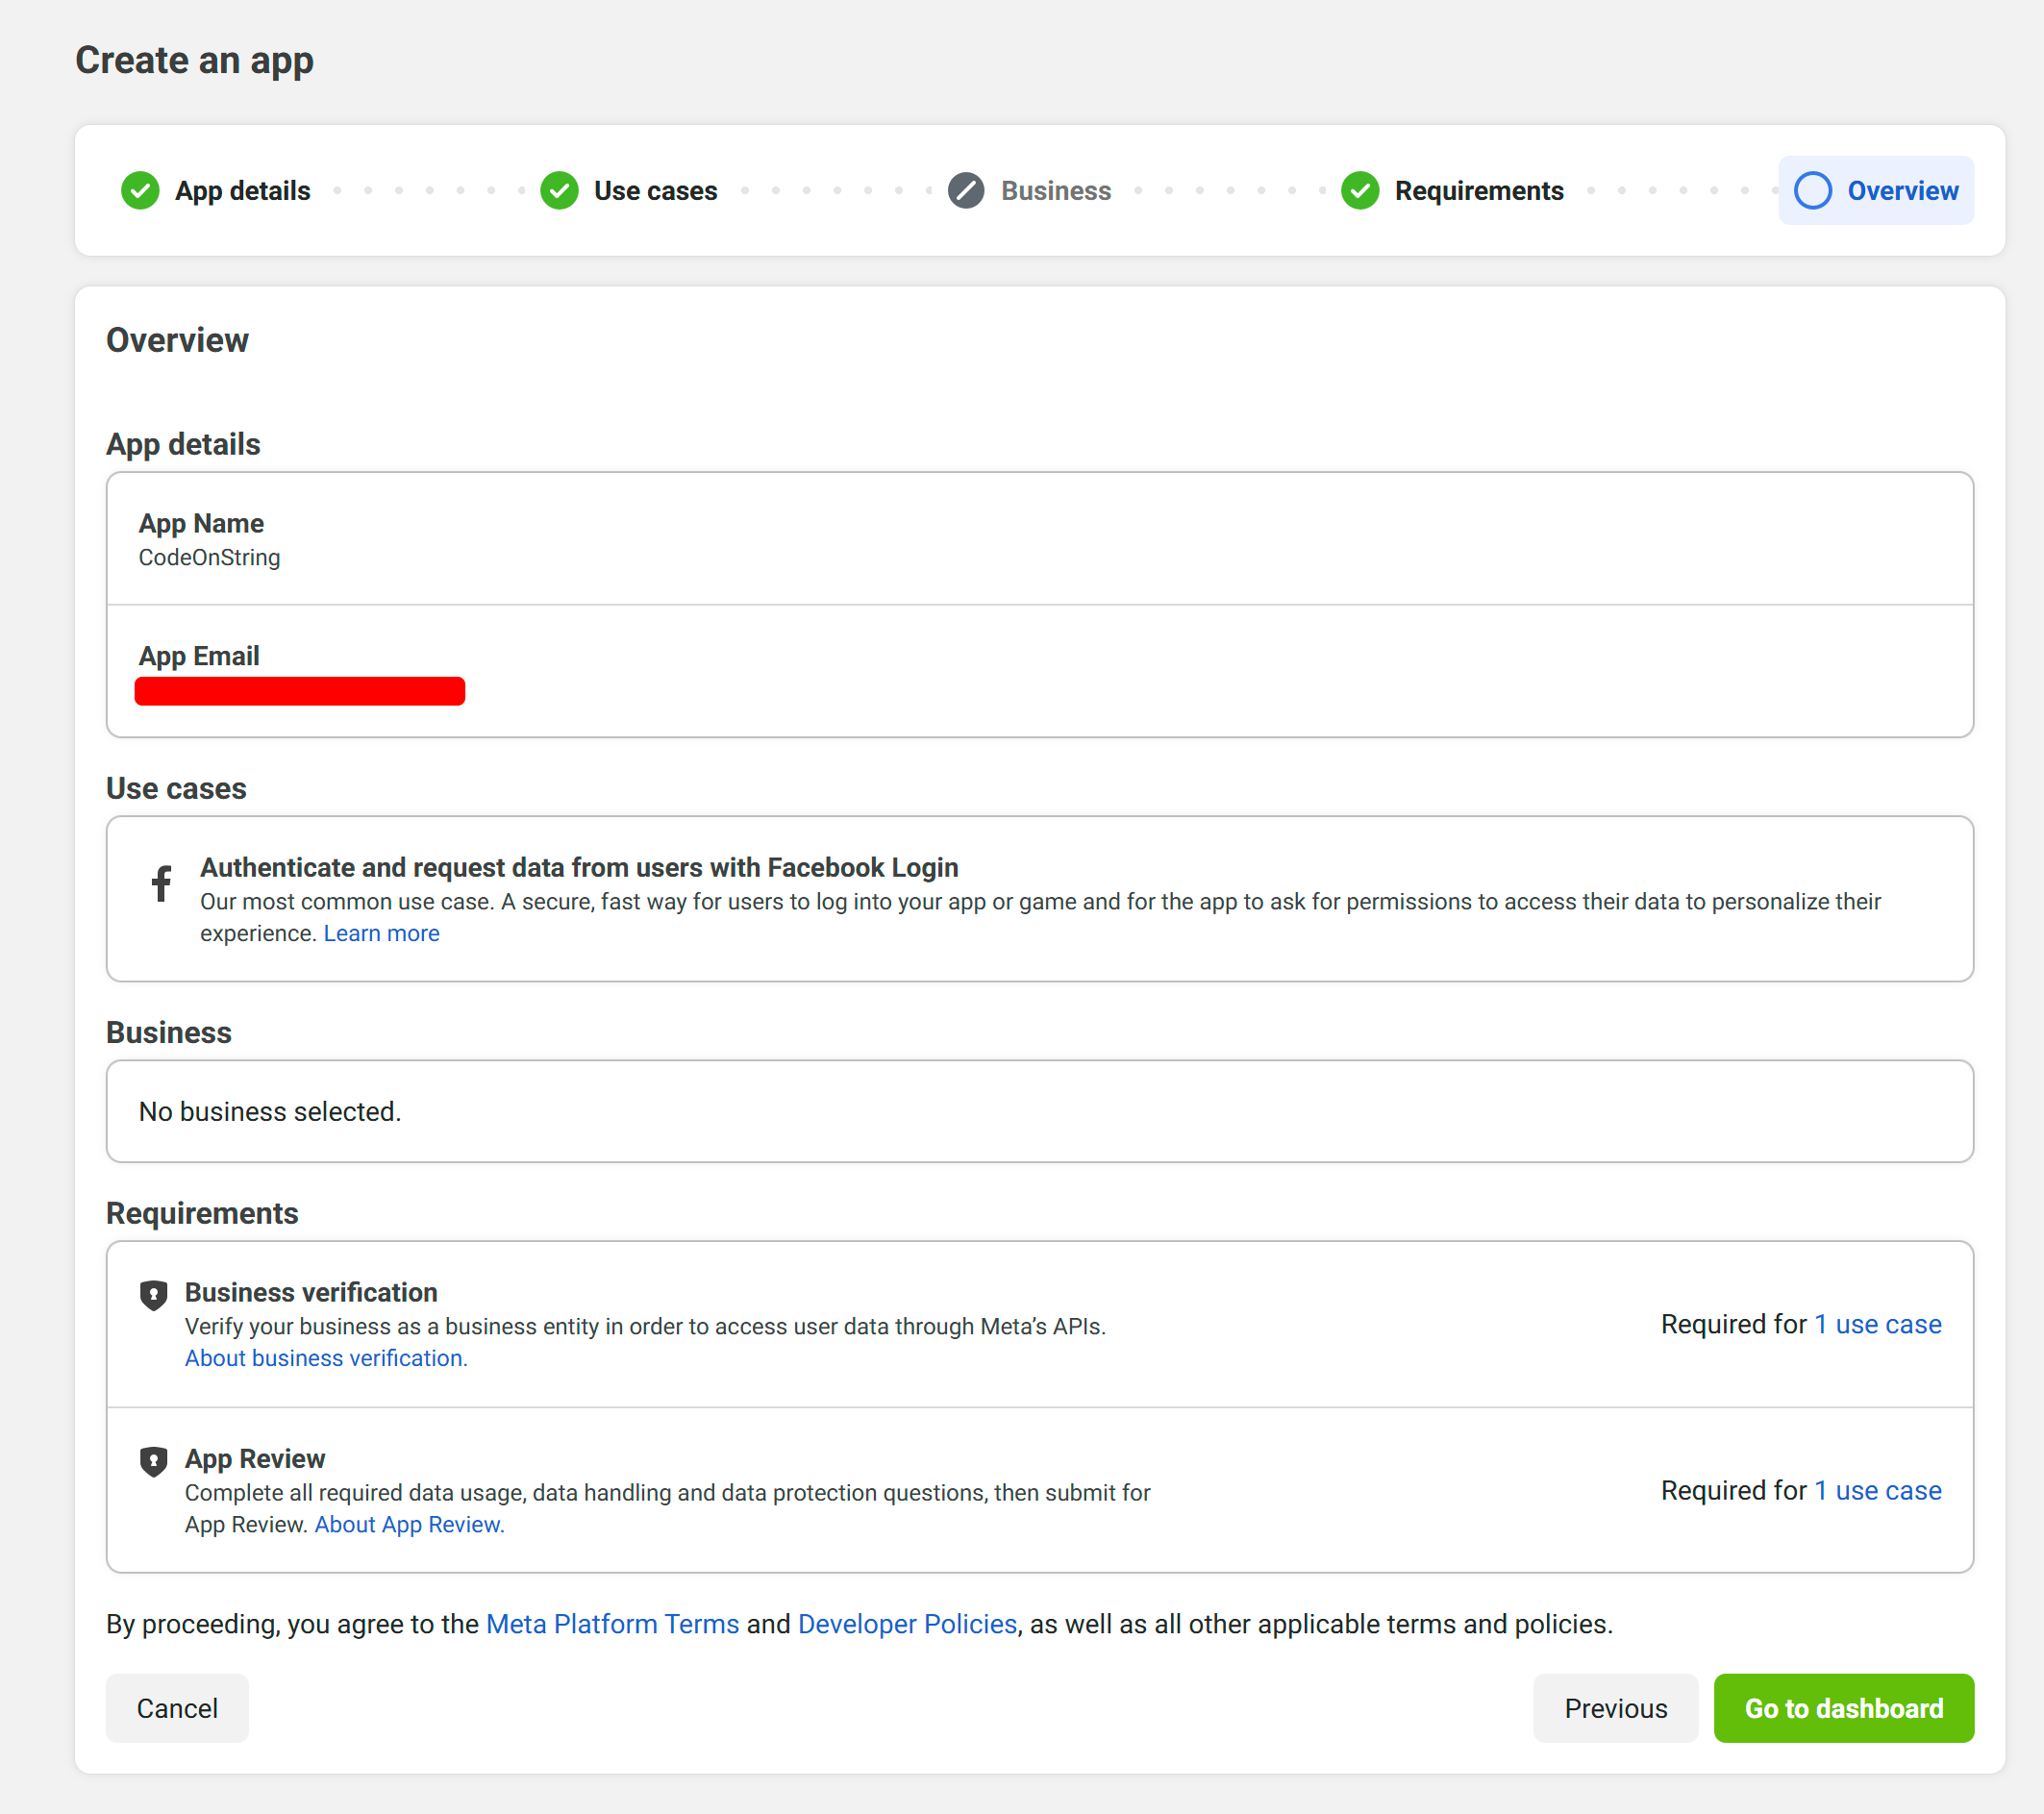
Overview, Verify all the details added and complete the process of app creation.
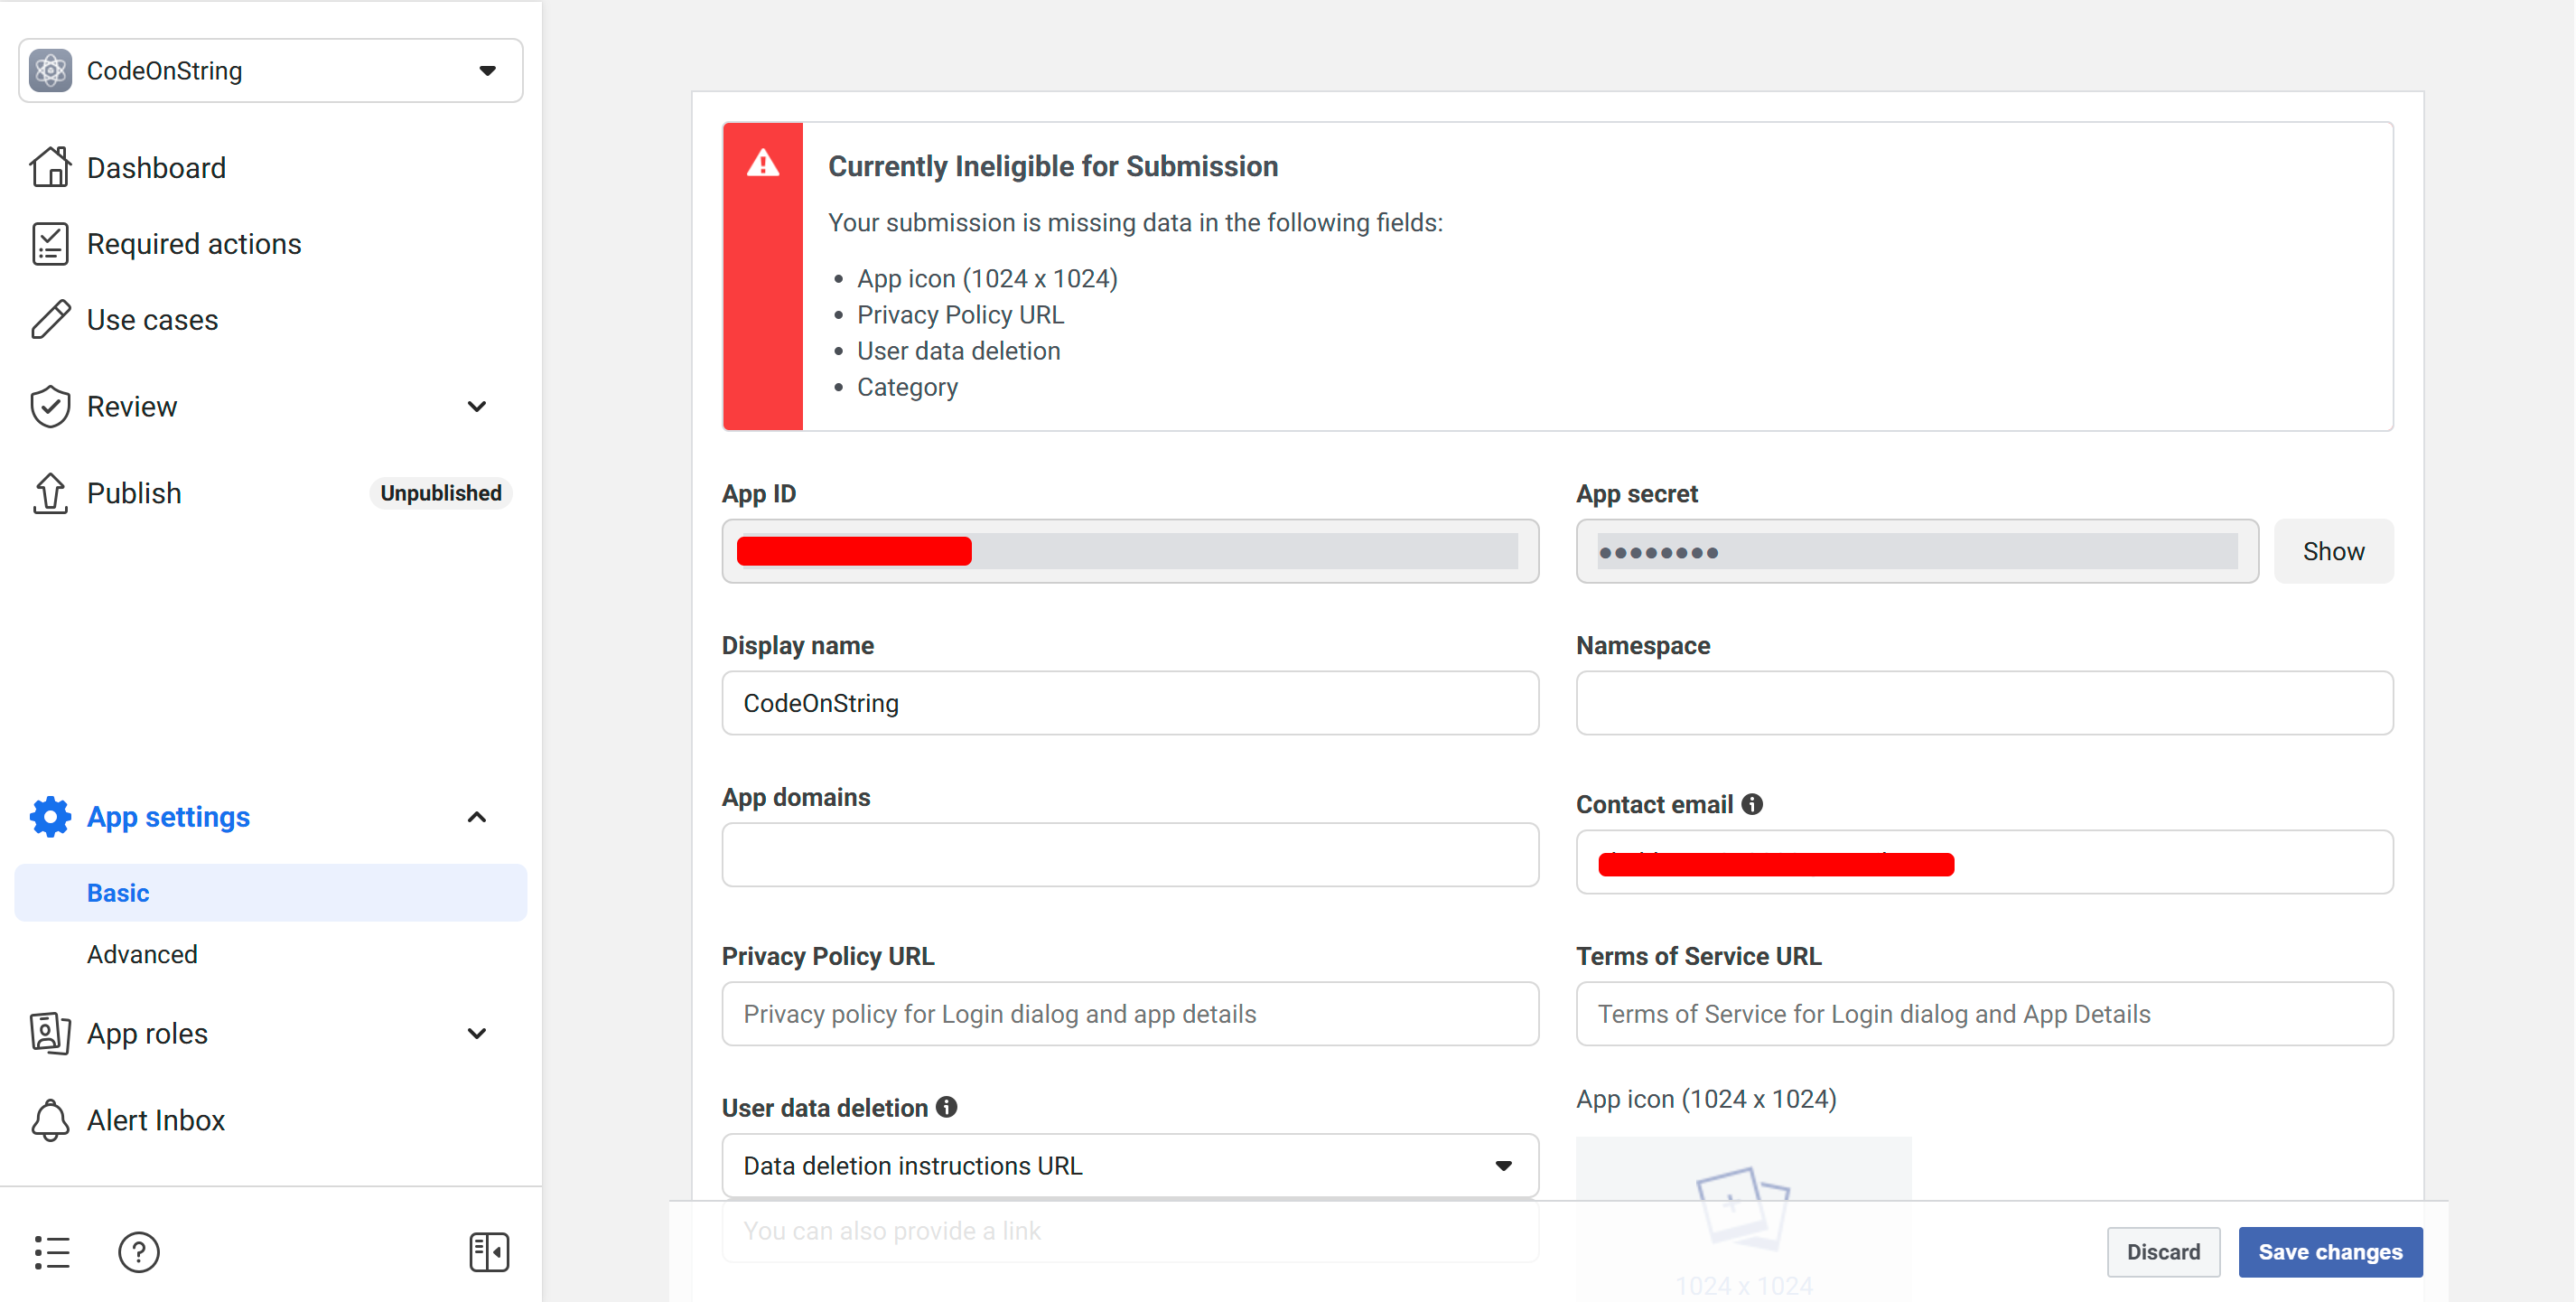
Once your app is created, navigate to Basic and enter the required details along with the necessary verification.
You will find the App ID and App Secret, but you must also provide links to your Privacy Policy and Terms & Conditions. These pages should be created within your project and shared with Facebook. The Terms & Conditions and Privacy Policy are essential, as they inform users how their data will be used and reassure them that their information is secure.
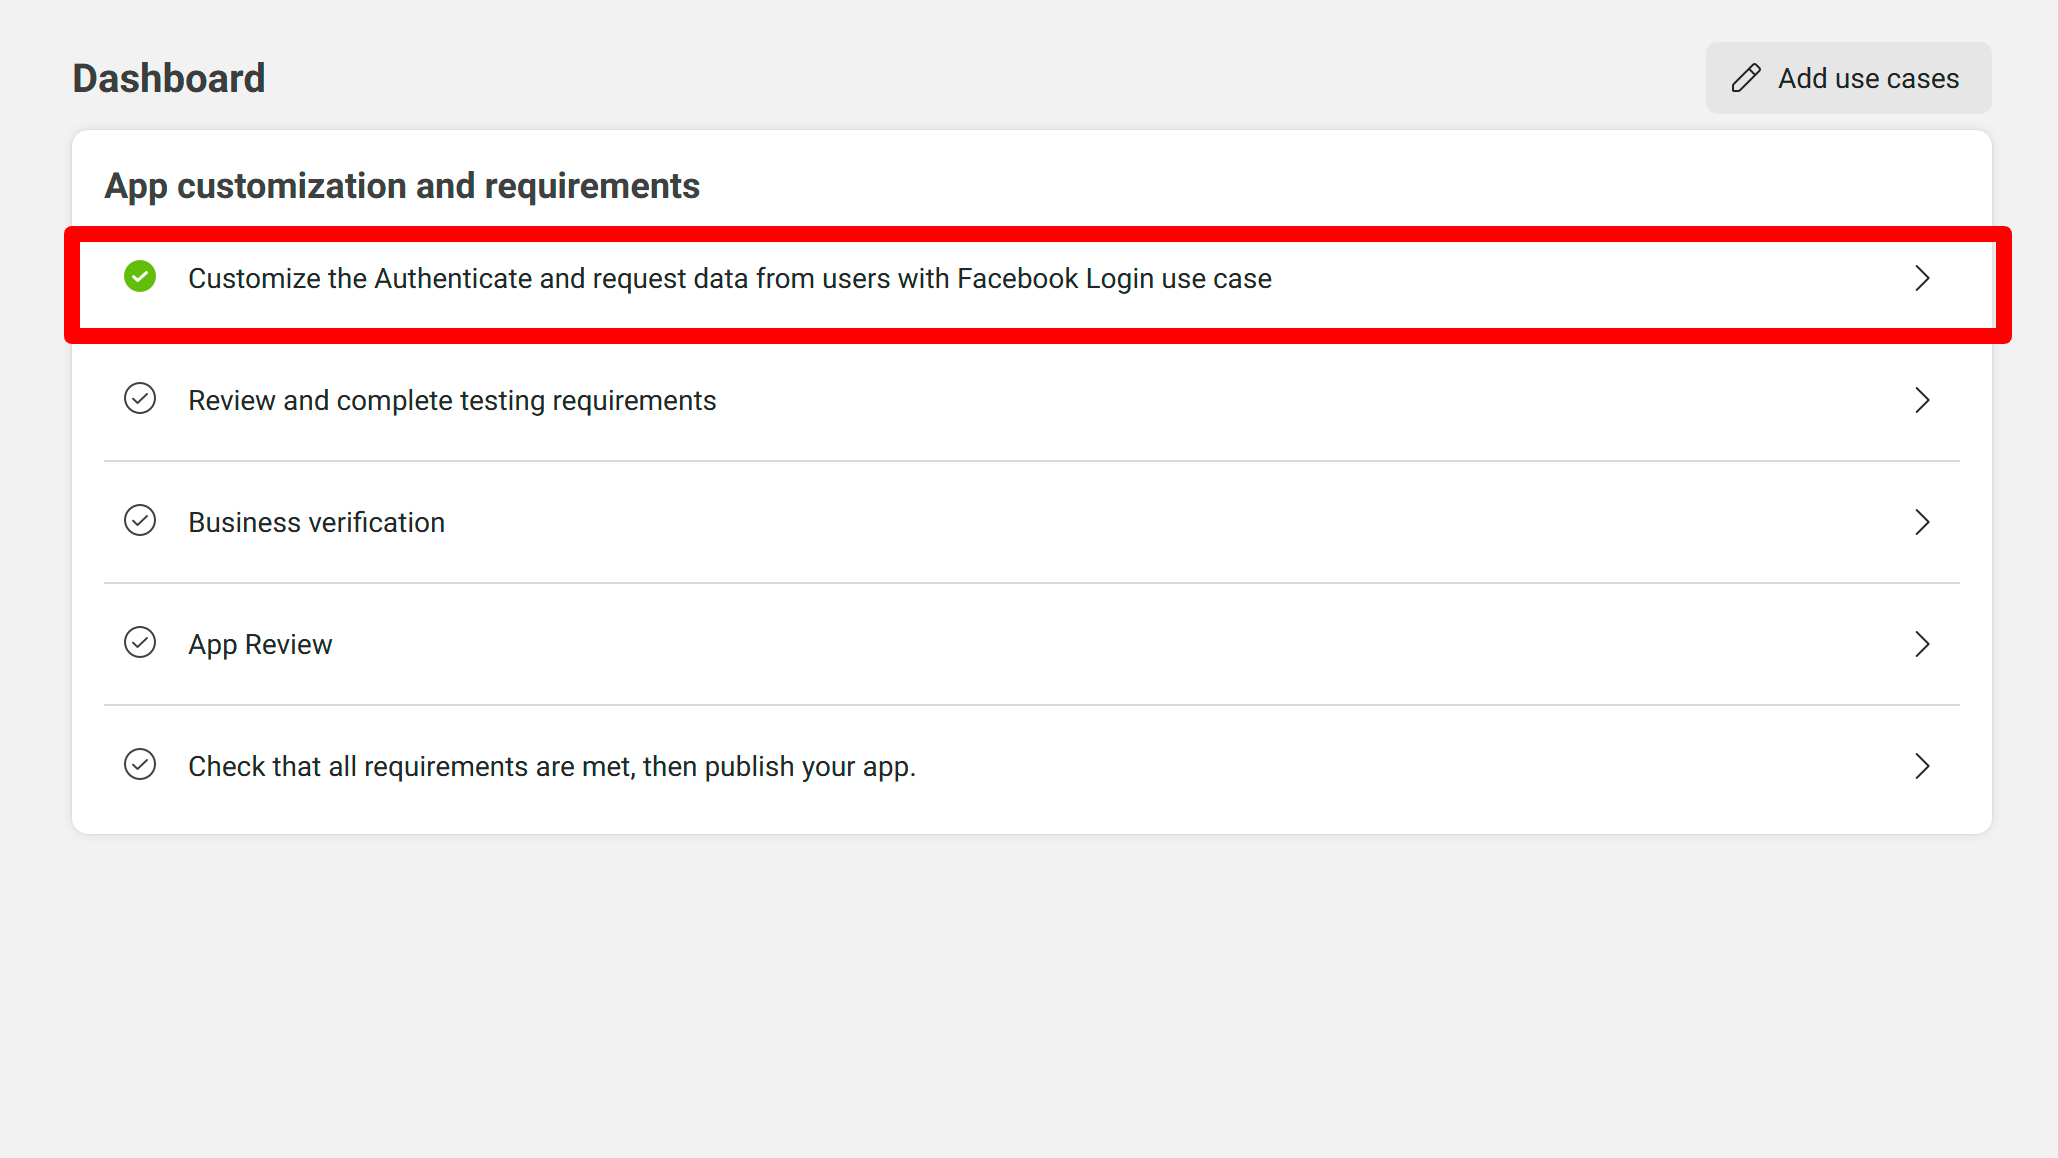
Go to the Dashboard where you'll find the option to enable Facebook Login authentication. If you've already set it up and verified it, the option should appear in the sidebar. If it's not visible, navigate to Products, where you should find it.
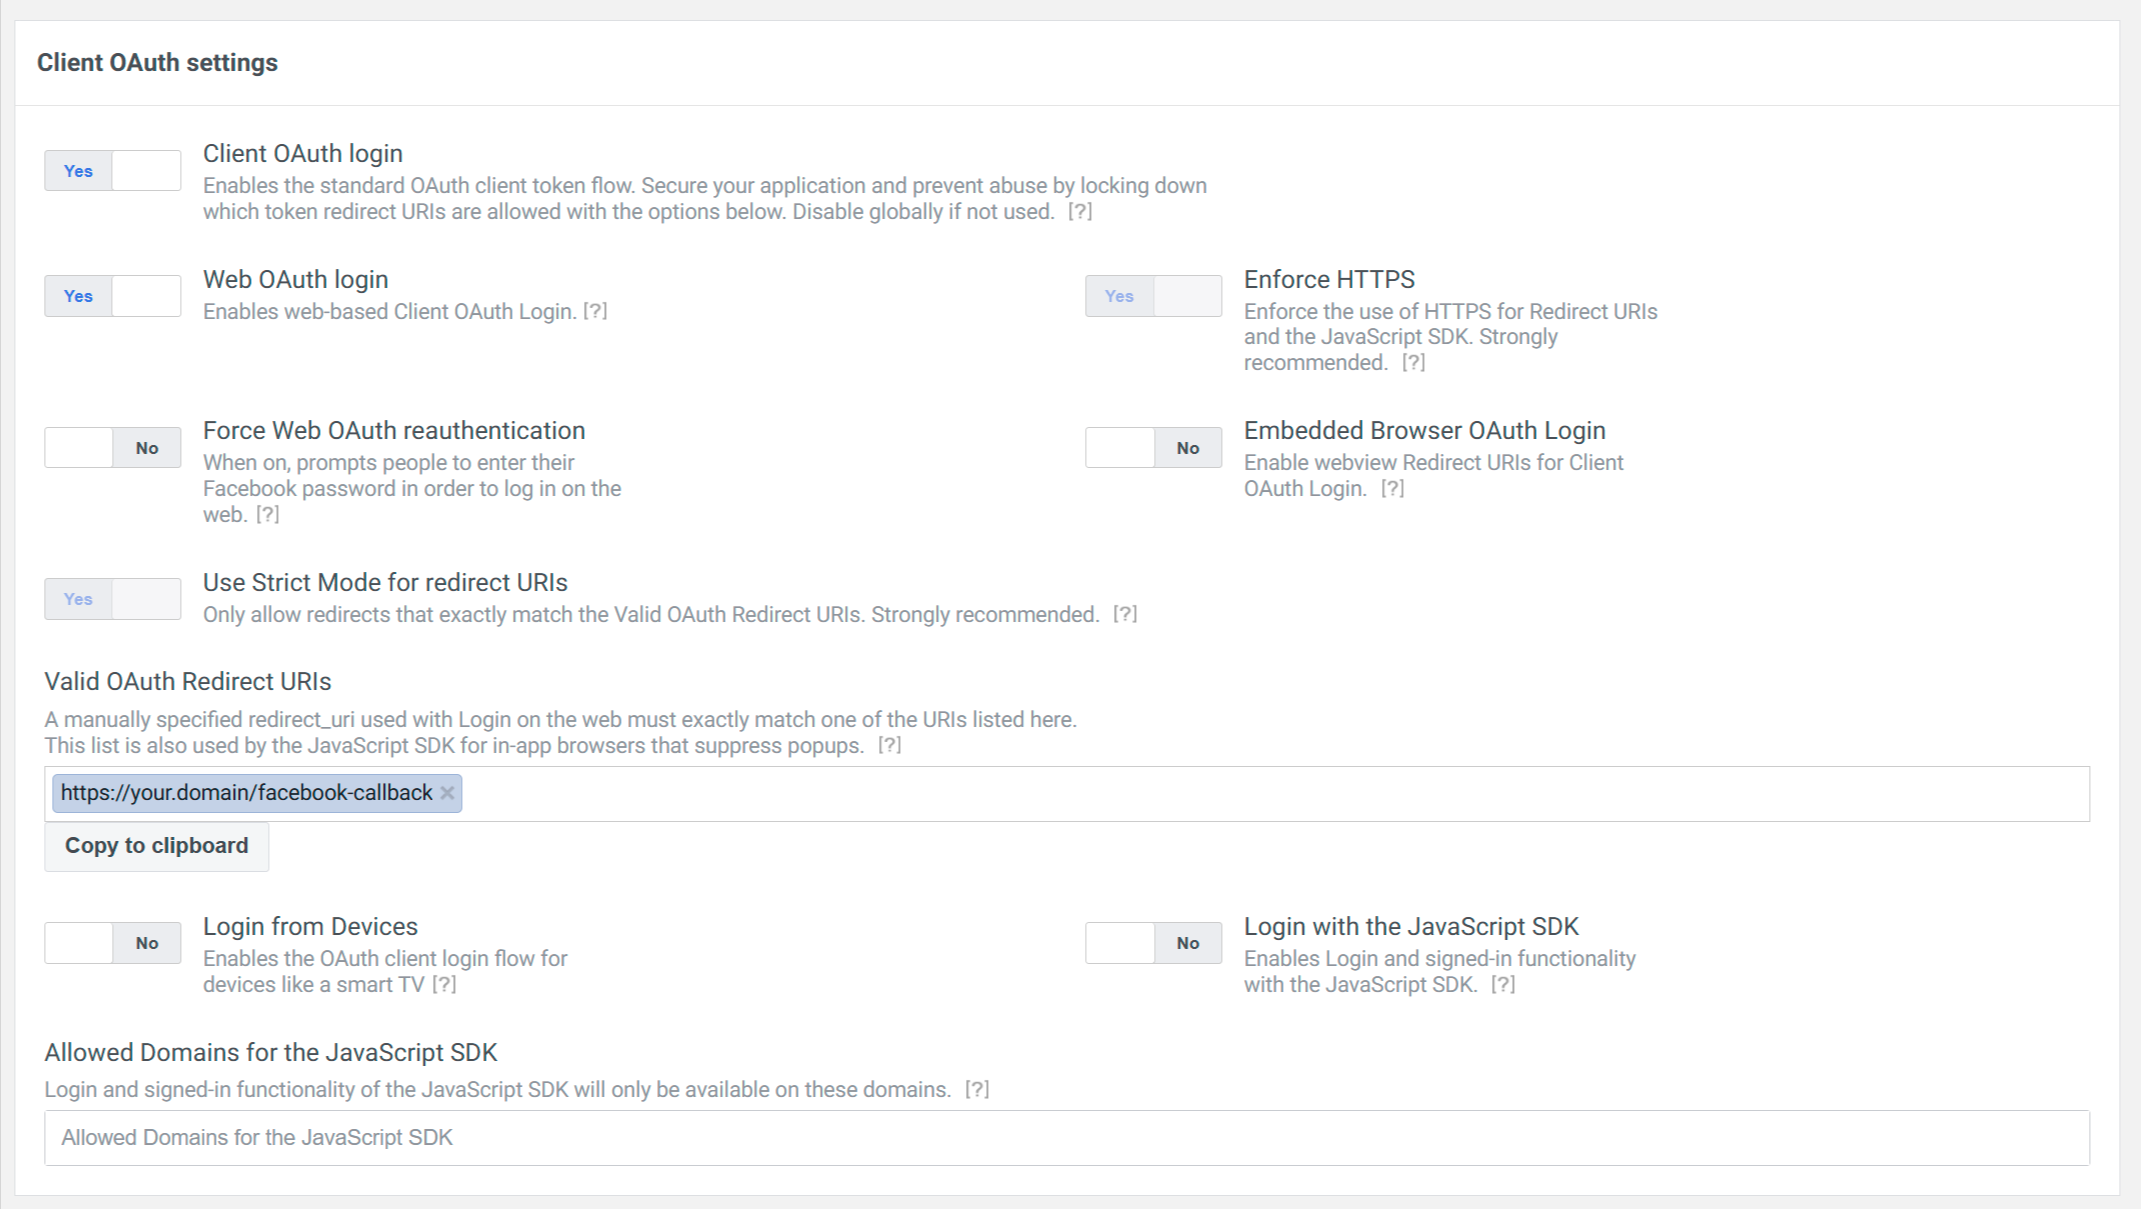
Simply use: https://your.domain/facebook-callback for callback url as we will create a route with this URL.
Step 2 : Installing Package
We will be using socialite package of laravel, To install this package run the command below.
composer require laravel/socialiteStep 3 : Update fileds in User Table
Open your user migration file and add the following two fields :
- Social Type : This field ensures that users who registered via Facebook cannot update their email.
- Social ID : A unique identifier provided by Facebook, used to verify if a user already exists. If a match is found, the login process is executed; otherwise, the registration process is initiated.
$table->string('social_id')->nullable();
$table->string('social_type')->default('email');Step 4 : Facebook Login process with Laravel
Let's create a Facebook Auth Controller. Run the following command to generate it, and the controller will be created at: app/Http/Auth/FacebookController.php
php artisan make:controller Auth/FacebookControllerNow, let's add the necessary routes. Open web.php and include the following routes.
use App\Http\Controllers\Auth\FacebookController;


// Facebook Login Routes
Route::get('auth-facebook', [FacebookController::class, 'redirectToFacebook'])->name('facebook.login');
Route::get('facebook-callback', [FacebookController::class, 'handleFacebookCallback'])->name('facebook.callback');Before working on the controller, let's first set up the login/registration button. Since designs vary, we'll primarily focus on the Facebook button. Open your login.blade.php file and add this button.
<a href="{{route('facebook.login')}}" class="btn btn-facebook">
    <span class="fab fa-facebook"></span> {{ __('Facebook') }}
</a>Now navigate to Auth\FacebookController.php and create a constructor function to dynamically set configuration credentials. You can store your credentials in .env or a database, depending on your system setup and preference.
public function __construct()
{
    $app_id = 'FACEBOOK_APP_ID';
    $app_secret = 'FACEBOOK_APP_SECRET';

    config(
        [
            'services.facebook.client_id' => $app_id,
            'services.facebook.client_secret' => $app_secret,
            'services.facebook.redirect' => route('facebook.callback'),
        ]
    );
}Create another function to redirect users to the Facebook login page (hosted by Facebook).
use Laravel\Socialite\Facades\Socialite;


public function redirectToFacebook()
{
    return Socialite::driver('facebook')->redirect();
}Create a function to handle the callback. This function will verify whether the user already exists in the system, If found, it will proceed with the login process; otherwise, it will create a new user using the data provided by Facebook.
use App\Models\User;
use Carbon\Carbon;
use Illuminate\Support\Facades\Auth;


public function handleFacebookCallback()
{
    try {
        // Retrieve user details from Facebook using Socialite
        $user = Socialite::driver('facebook')->user();

        // Check if the user already exists in the database using their Facebook social ID
        $facebookId = User::where('social_id', $user->id)->first();

        // Ensure the email is not null before processing login or registration
        if ($user->email != null) {
            if ($facebookId) {
                // If user exists, log them in and redirect to the home page
                Auth::login($facebookId);
                return redirect('/home');
            } else {
                // Extract first and last name from the user's full name
                $fullName = explode(' ', $user->name);
                $firstname = $fullName[0];
                $lastname = isset($fullName[1]) ? $fullName[1] : '';

                if (!empty($facebookId->social_type) && $facebookId->social_type == 'facebook') {
                    // Update user details with Facebook-provided data
                    $createUser = [
                        'first_name' => $firstname,
                        'last_name' => $lastname,
                        'email' => $user->email,
                        'social_id' => $user->id,
                        'profile' => $user->avatar,
                    ];
                } else {
                    // Create a new user if they do not exist in the database
                    $createUser = [
                        'first_name' => $firstname,
                        'last_name' => $lastname,
                        'email' => $user->email,
                        'social_id' => $user->id,
                        'social_type' => 'facebook',
                        'password' => encrypt('123456789'), // Assigning a default encrypted password
                        'profile' => $user->avatar,
                        'email_verified_at' => Carbon::now()->format('Y-m-d H:i:s') // Mark email as verified
                    ];
                }

                // Save the new or updated user record in the database
                User::updateOrCreate(
                    ['email' => $user->email],
                    $createUser
                );

                // Retrieve the newly created or updated user and log them in
                $login_user = User::where('email', $createUser['email'])->first();
                Auth::login($login_user);

                // Redirect the user to the home page after successful login or registration
                return redirect('/home');
            }
        } else {
            // Redirect back with an error if the user's email is not verified
            return redirect()->back()->with('error', 'E-mail is not verified!');
        }
    } catch (\Exception $exception) {
        // Handle any exceptions and redirect back to the login page with an error message
        return redirect()->back()->with('error', $exception->getMessage());
    }
}That's a wrap! As we mentioned, It doesn't require separate processes for login and registration, The same function efficiently handles both. Just place the Facebook button on both the login and registration pages, and the flow will work seamlessly.