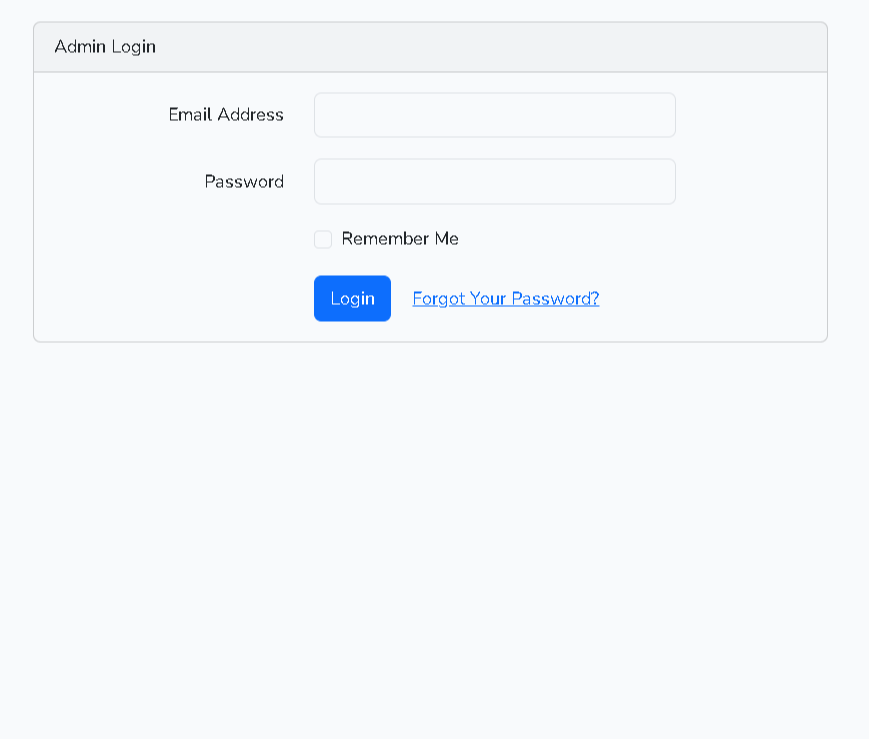
Preview :

In this post we will learn how to create multiple authentication system in laravel with 2 diffrent login page and registration page, If you do not have auth in your project then we need to create one, but if you already have one auth then you can start from step 7
Setp 1 : Install the Laravel UI package
Install the Laravel UI official package for making Auth scaffolding, Now you need to open the project which you just created and run this composer command to install Laravel UI package in that project
composer require laravel/ui:*Step 2 : Generate auth scaffolding
After installation of Laravel UI package. We are now able to scaffold our Auth with Bootstrap, Vue, React etc, If you want to generate scaffold with Bootstrap then we have to run the command like below.
php artisan ui bootstrap --authStep 3 : Install NPM (Node package manager)
In this step, we have to install all our NPM dependencies, To install NPM dependencies run the command given below.
npm installStep 4 : Build NPM (Node package manager)
This is the plumbing command called by npm link and npm install
npm run buildStep 5 : Table Fields
To mange fields of user table goto database/migrations, In migrations folder you will see multiple files open a file called _create_users_table.php, Edit user table as per your requirements and run the command below, This command will create tables of all pending migrations.
php artisan migrateStep 6 : Auth Routes
If you wish to disable register, reset password and email verify route then go to the routes/web.php and change the auth routes.
Auth::routes([
  'register' => false, // Registration Routes...
  'reset' => false, // Password Reset Routes...
  'verify' => false, // Email Verification Routes...
]);Step 7 : Second Auth
Now we will create second auth, So first we will create model, migration and controller with a single command.
php artisan make:model Customer -mcrIn this step, We will add fields to our customer table, To mange fields of customer table goto database/migrations, In migrations folder you will see multiple files open a file called _create_customers_table.php, Edit customer table as per your requirements and run migration command it will create tables of all pending migrations.
Schema::create('customers', function (Blueprint $table) {
    $table->id();
    $table->string('name');
    $table->string('email')->unique();
    $table->string('password');
    $table->timestamps();
});php artisan migrateStep 8 : Auth Guard
In Laravel, a guard is a mechanism that determines how users are authenticated for each request. Laravel provides different types of guards, such as sessions and tokens.
The session guard maintains the state of the user in each request using cookies. On the other hand, the token guard authenticates the user by checking a valid token in every request.
Guards define how the system should store and retrieve information about your users. For example, a web guard instructs Laravel to store and retrieve session information the traditional way, while the API guard uses tokens.
You can also create your own guard if you wish. As long as the default guard should be used, an additional `->guard()` can be omitted with peace of mind.
Please note that guards and providers should not be confused with "roles" and "permissions".
We can create guard in /config/auth.php
//Authentication Guards
'guards' => [
    'web' => [
        'driver' => 'session',
        'provider' => 'users',
    ],
    'customer' => [
        'driver' => 'session',
        'provider' => 'customer',
    ],
],


//User Providers
'providers' => [
    'users' => [
        'driver' => 'eloquent',
        'model' => App\Models\User::class,
    ],
    'customer' => [
        'driver' => 'eloquent',
        'model' => App\Models\Customer::class,
    ],
],


// Resetting Passwords
'passwords' => [
    'users' => [
        'provider' => 'users',
        'table' => 'password_resets',
        'expire' => 60,
        'throttle' => 60,
    ],
    'customer' => [
        'provider' => 'customer',
        'table' => 'password_resets',
        'expire' => 60,
    ],
],Step 9 : Update Customer Model
We will extend Authenticatable in customer model and add fillable.
<?php

namespace App\Models;

use Illuminate\Foundation\Auth\User as Authenticatable;

class Customer extends Authenticatable
{
    protected $fillable = [
        'name',
        'email',
        'password'
    ];
}Step 10 : Creating Middleware
We will create a middleware to handle customer login session, To create a middleware run the command below.
php artisan make:middleware AuthCustomerNow a middleware named AuthCustomer should've been created in app/Http/Middleware/AuthCustomer.php, So lets open it and update the code, We will just check if user is authenticated with customer guard, If authenticated then continue to next page else redirect to customer login page.
<?php

namespace App\Http\Middleware;

use Closure;
use Illuminate\Http\Request;
use Symfony\Component\HttpFoundation\Response;

class AuthCustomer
{
    public function handle(Request $request, Closure $next): Response
    {
        if(auth()->guard('customer')->check())
        {
            return $next($request);
        }
        else
        {
            return redirect('customer-login');
        }
    }
}Step 11 : Creating Customer Login Controller
Now we will create a customer login controller in /app/Http/Controllers/Customer/Auth/CustomerLoginController.php we will handle login functions in this controller, To create a controller run the command below.
php artisan make:controller Customer/Auth/CustomerLoginControllerNow lets add 4 routes :
- Resource route for CustomerController
- Customer login route for CustomerLoginController
- Post route when login form is submited
- Logout route
use App\Http\Controllers\CustomerController;
use App\Http\Controllers\Customer\Auth\CustomerLoginController;


Route::resource('customer', CustomerController::class);

Route::get('customer-login',[CustomerLoginController::class, 'showLoginForm'])->name('customer.login-form');
Route::post('customer-login',[CustomerLoginController::class, 'login'])->name('customer.login');

Route::post('customer-logout',[CustomerLoginController::class, 'logout'])->name('customer.logout');<?php
namespace App\Http\Controllers\Customer\Auth;
use App\Http\Controllers\Controller;
use Illuminate\Auth\Authenticatable;
use Illuminate\Http\Request;
class CustomerLoginController extends Controller
{
use Authenticatable;
public function showLoginForm()
{
return view('customer.auth.login');
}
}Now lets create a customer login page
resources/views/customer/auth/login.blade.php
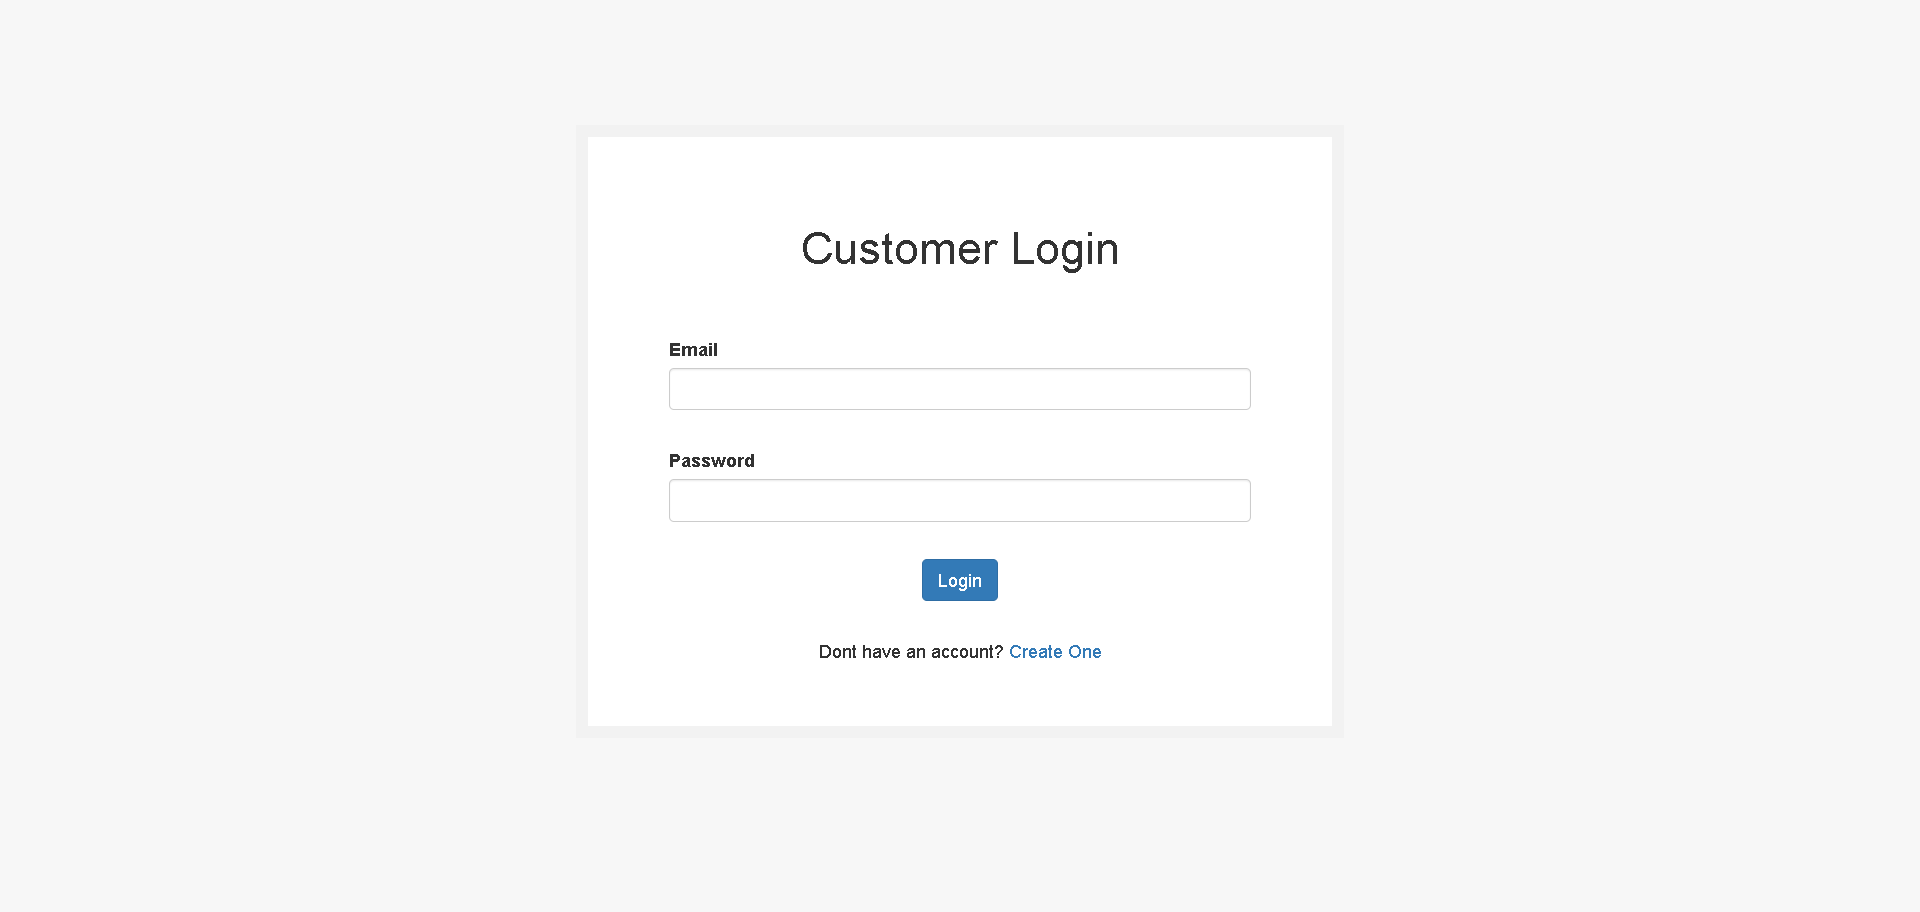
<!DOCTYPE html>
<html lang="en">
<head>
    <meta charset="utf-8">
    <meta name="viewport" content="width=device-width, initial-scale=1">

    <title>Customer Login</title>

    <!-- BOOTSTRAP -->
    <link href="https://maxcdn.bootstrapcdn.com/bootstrap/3.3.6/css/bootstrap.min.css" rel="stylesheet" />
    <!-- Styles -->
    <style>
        body {
            background: #f7f7f7;
        }

        .form-box {
            max-width: 40%;
            margin: auto;
            padding: 50px;
            background: #ffffff;
            border: 10px solid #f2f2f2;
            margin-top: 100px;
        }

        h1, p {
            text-align: center;
        }

        input, textarea {
            width: 100%;
        }
        form{
            padding-top: 40px;
        }
        .form-group{
            margin-bottom: 30px;
        }
    </style>
</head>
<body>
    <div class="form-box">
        <h1>Customer Login</h1>
        <form action="{{ route('customer.login') }}" method="post" enctype="multipart/form-data">
            @csrf
            <div class="form-group col-md-12">
                <label for="email" class="form-control-label">Email</label>
                <input type="email" name="email" class="form-control" id="email" value="{{ old('email') }}">
            </div>
            <div class="form-group col-md-12">
                <label for="password" class="form-control-label">Password</label>
                <input type="password" name="password" class="form-control" id="password">
            </div>
            <div class="form-group col-md-12 text-center">
                <button class="btn btn-primary" type="submit">Login</button>
            </div>
            <div class="col-12 text-center">
                Dont have an account? <a href="{{ route('customer.create') }}">Create One</a>
            </div>
        </form>
    </div>
</body>
</html>Now lets register a new customer we will use create and store function which was created by -mcr command in CustomerController, You can also use factory to create demo customers, If you dont know how to use factory then please visit this post
// CustomerController
public function create()
{
    return view('customer.auth.register');
}Now lets create a customer registration page
resources/views/customer/auth/register.blade.php
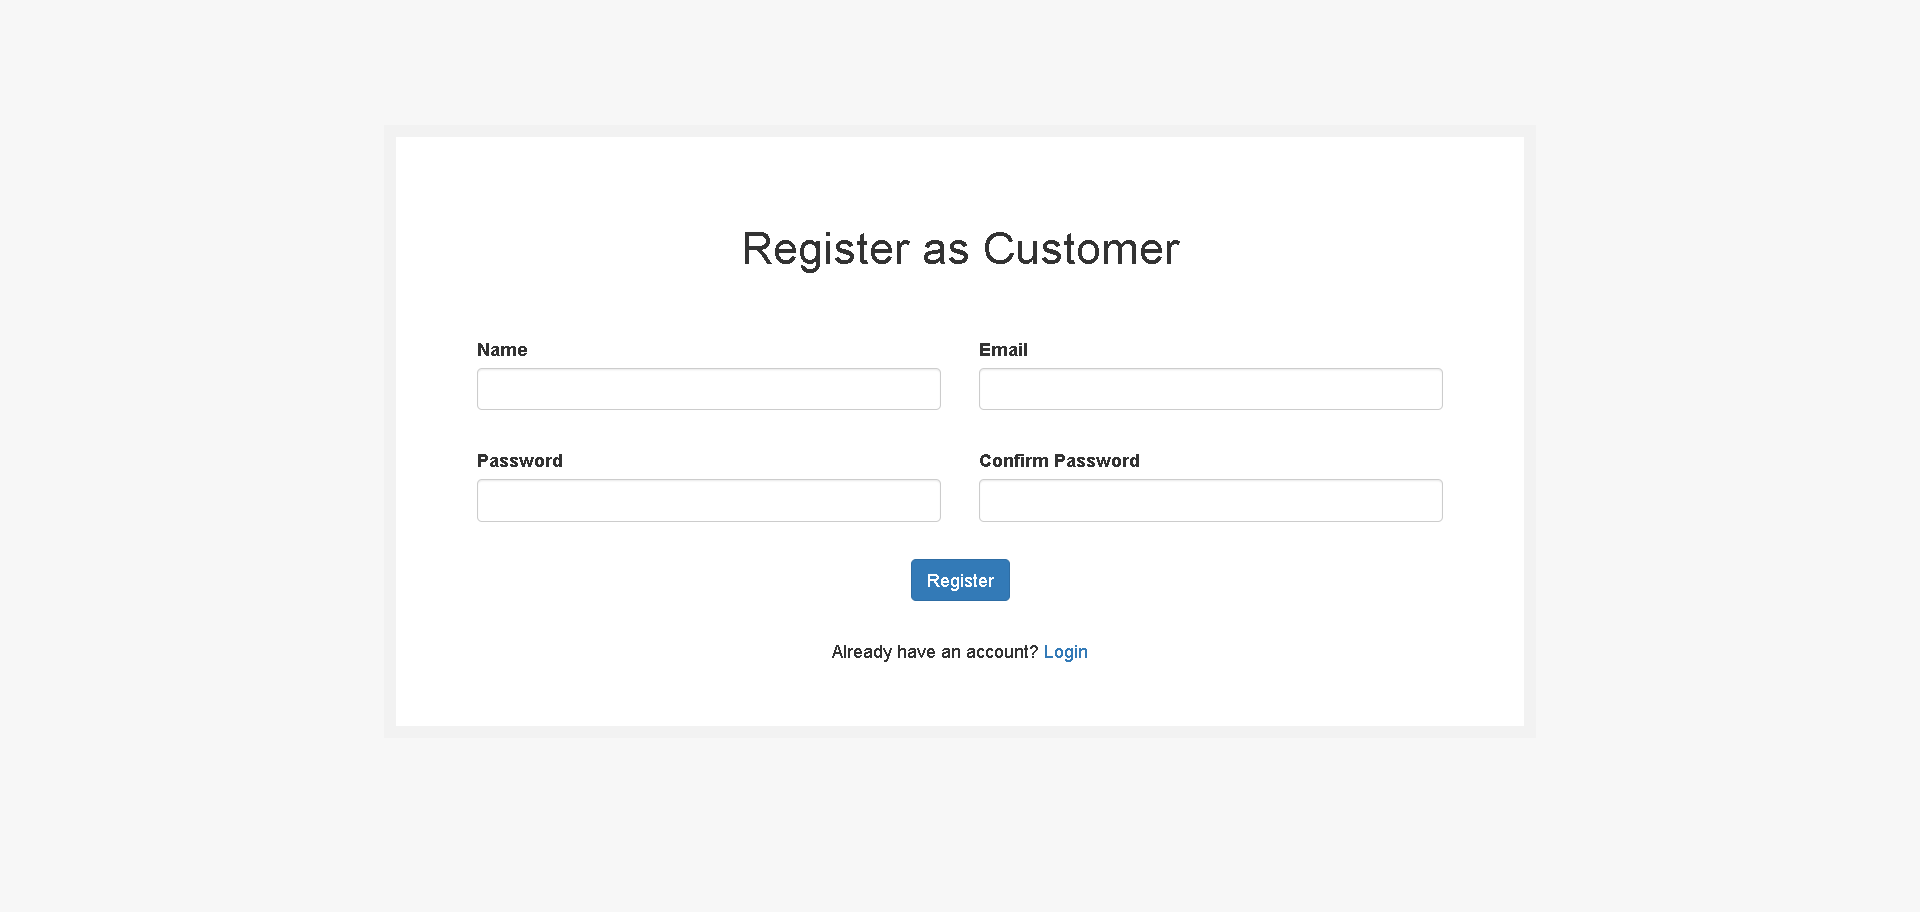
<!DOCTYPE html>
<html lang="en">
<head>
    <meta charset="utf-8">
    <meta name="viewport" content="width=device-width, initial-scale=1">

    <title>Customer Login</title>

    <!-- BOOTSTRAP -->
    <link href="https://maxcdn.bootstrapcdn.com/bootstrap/3.3.6/css/bootstrap.min.css" rel="stylesheet" />
    <!-- Styles -->
    <style>
        body {
            background: #f7f7f7;
        }

        .form-box {
            max-width: 60%;
            margin: auto;
            padding: 50px;
            background: #ffffff;
            border: 10px solid #f2f2f2;
            margin-top: 100px;
        }

        h1, p {
            text-align: center;
        }

        input, textarea {
            width: 100%;
        }
        form{
            padding-top: 40px;
        }
        .form-group{
            margin-bottom: 30px;
        }
    </style>
</head>
<body>
<div class="form-box">
    <h1>Register as Customer</h1>
    <form action="{{ route('customer.store') }}" method="post" enctype="multipart/form-data">
        @csrf
        <div class="form-group col-md-6">
            <label for="name" class="form-control-label">Name</label>
            <input type="text" name="name" class="form-control" id="name" value="{{ old('name') }}">
        </div>
        <div class="form-group col-md-6">
            <label for="email" class="form-control-label">Email</label>
            <input type="email" name="email" class="form-control" id="email" value="{{ old('email') }}">
        </div>
        <div class="form-group col-md-6">
            <label for="password" class="form-control-label">Password</label>
            <input type="password" name="password" class="form-control" id="password">
        </div>
        <div class="form-group col-md-6">
            <label for="password_confirmation" class="form-control-label">Confirm Password</label>
            <input type="password" name="password_confirmation" class="form-control" id="password_confirmation">
        </div>
        <div class="form-group col-md-12 text-center">
            <button class="btn btn-primary" type="submit">Register</button>
        </div>
        <div class="col-12 text-center">
            Already have an account? <a href="{{ route('customer.login') }}">Login</a>
        </div>
    </form>
</div>
</body>
</html>In CustomerController we already have a store function but its a public function we will change it to protected.
- Validate Customer Data
- Save Customer Data
- Start Auth Session
- Redirect to Customer Dashboard
To handle errors beautifully with toaster please check this post
// CustomerController
protected function store(Request $request)
{
    $validate = \Validator::make(
        $request->all(), [
            'name' => [
                'required',
                'string',
                'max:191',
            ],
            'email' => [
                'required',
                'email',
                'max:191',
                'unique:customers',
            ],
            'password' => [
                'required',
                'string',
                'min:8',
                'confirmed',
            ],
        ]
    );

    if($validate->fails())
    {
        $message = $validate->getMessageBag();
        return redirect()->back()->withInput()->with('error', $message->first());
    }

    // save customer
    $customer               = new Customer();
    $customer->name         = $request->name;
    $customer->email        = $request->email;
    $customer->password     = Hash::make($request->password);
    $customer->save();

    // create login session
    auth()->guard('customer')->login($customer);

    // redirect to customer dashboard
    return redirect()->route('customer.dashboard');
}Step 12 : Using Customer Middleware
Now we have registered a new customer we will have to use middleware and so first we will assign middleware in app/Http/Middleware/Kernel.php
protected $middlewareAliases = [
'customer' => \App\Http\Middleware\AuthCustomer::class,// web.php
Route::get('customer-dashboard',[CustomerDashboard::class, 'index'])->name('customer.dashboard')->middleware('customer');Step 13 : Login as Customer
When user login we will first validate data and then process for login we will use laravel attepmt method, Attempt method will match email and password in database and if it get a match then it will create an auth session for that customer, After that we will redirect it to customer dashboard, So lets open CustomerLoginController and create few functions
// CustomerLoginController
private function validator(Request $request)
{
    $validate = \Validator::make($request->all(), [
        'email' => [
            'required',
            'string',
            'email',
            'min:5',
            'max:191',
        ],
        'password' => [
            'required',
            'string',
            'max:191',
        ],
    ]);

    if($validate->fails())
    {
        $message = $validate->getMessageBag();
        return redirect()->back()->withInput(['email'])->with('error', $message->first());
    }

    return true;
}// CustomerLoginController
public function login(Request $request)
{
if($this->validator($request) && auth()->guard('customer')->attempt(['email' => $request->email, 'password' => $request->password]))
{
return redirect()->route('customer.dashboard');
}
//Authentication failed...
return redirect()
->back()
->withInput()
->with('error',__('These credentials do not match our records'));
}Step 14 : Logout Customer
Now we are in final step of logout, We will create a logout function in CustomerLoginController in this function we will just logout customer, Also lets add a button for logout in frontend.
<div class="form-box">
    <h1>Welcome to dashboard, {{ auth()->guard('customer')->user()->name }}</h1>
    <form action="{{ route('customer.logout') }}" method="post" enctype="multipart/form-data">
        @csrf
        <div class="col-12 text-center">
            <button type="submit" class="btn btn-primary">Logout</button>
        </div>
    </form>
</div>// CustomerLoginController
public function logout()
{
auth()->guard('customer')->logout();
return redirect()->route('customer.login-form');
}