This post will be step-by-step guide on creating a firebase project and obtaining the configuration file.
- Create a Firebase Project :
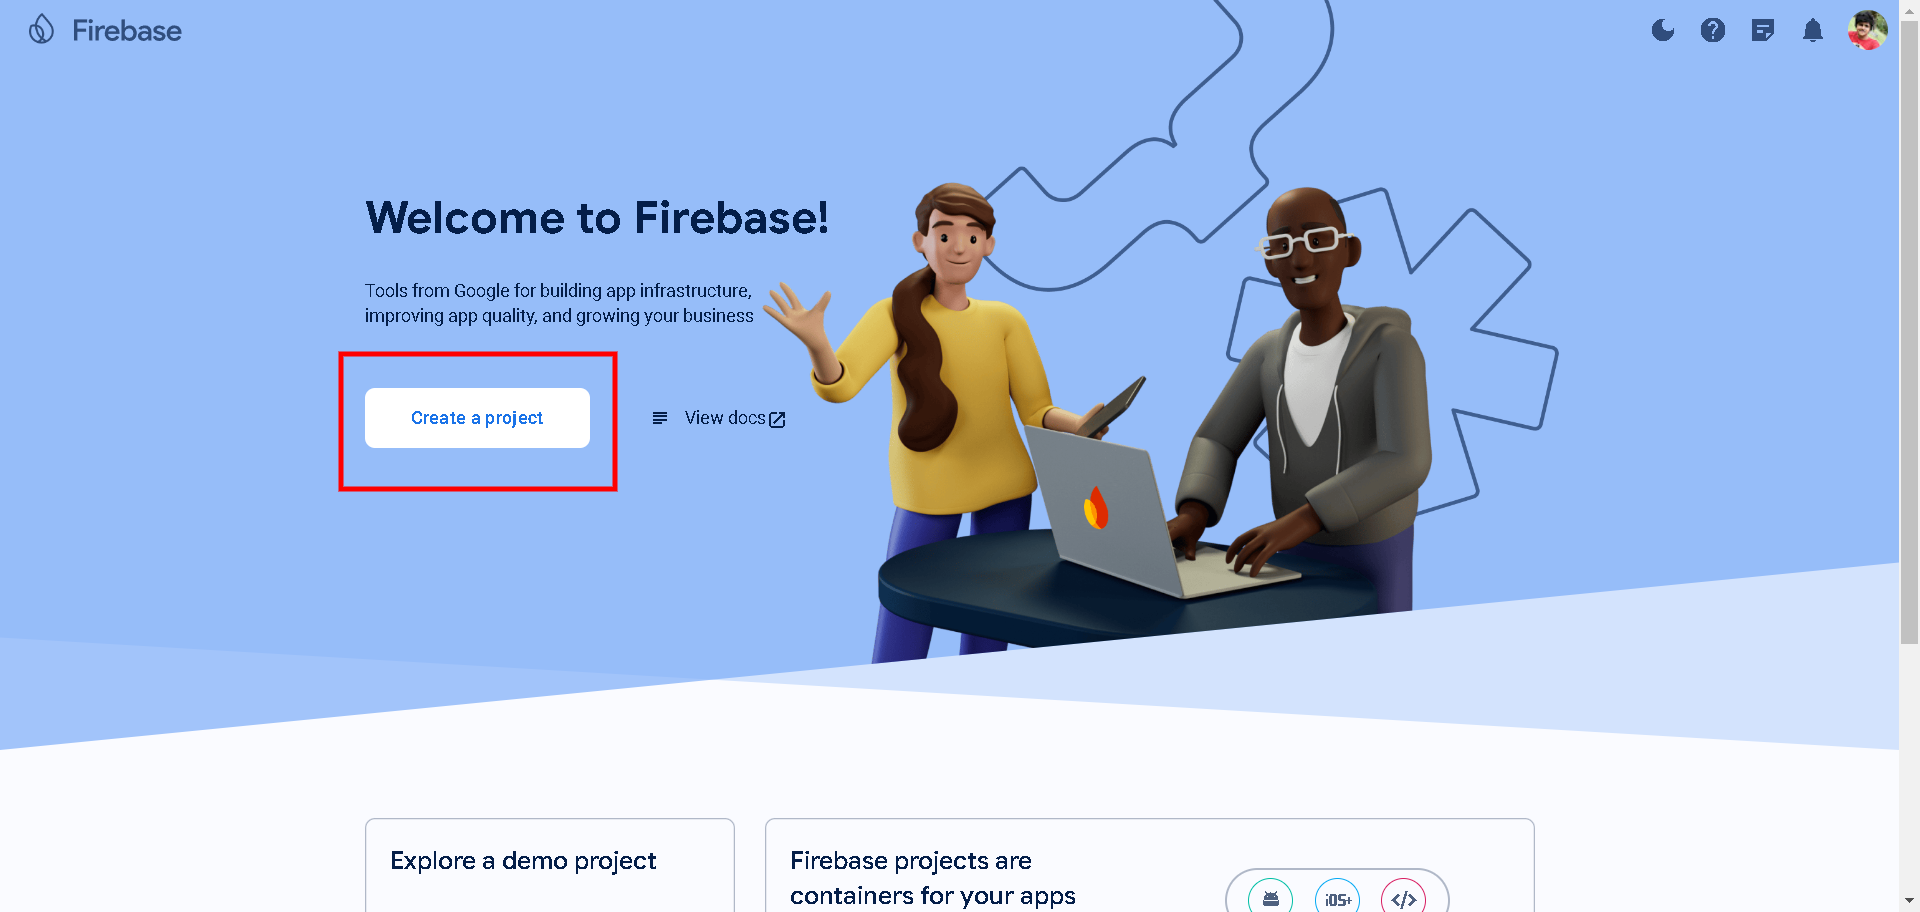
1. To create firebase project visit firebase console : console.firebase.google.com
2. Click on 'Add project' or select an existing project.
3. Provide a project name and choose your preferred region.
4. Click a 'Create a project.' and complete the process of creating project.

- Get the Configuration File:
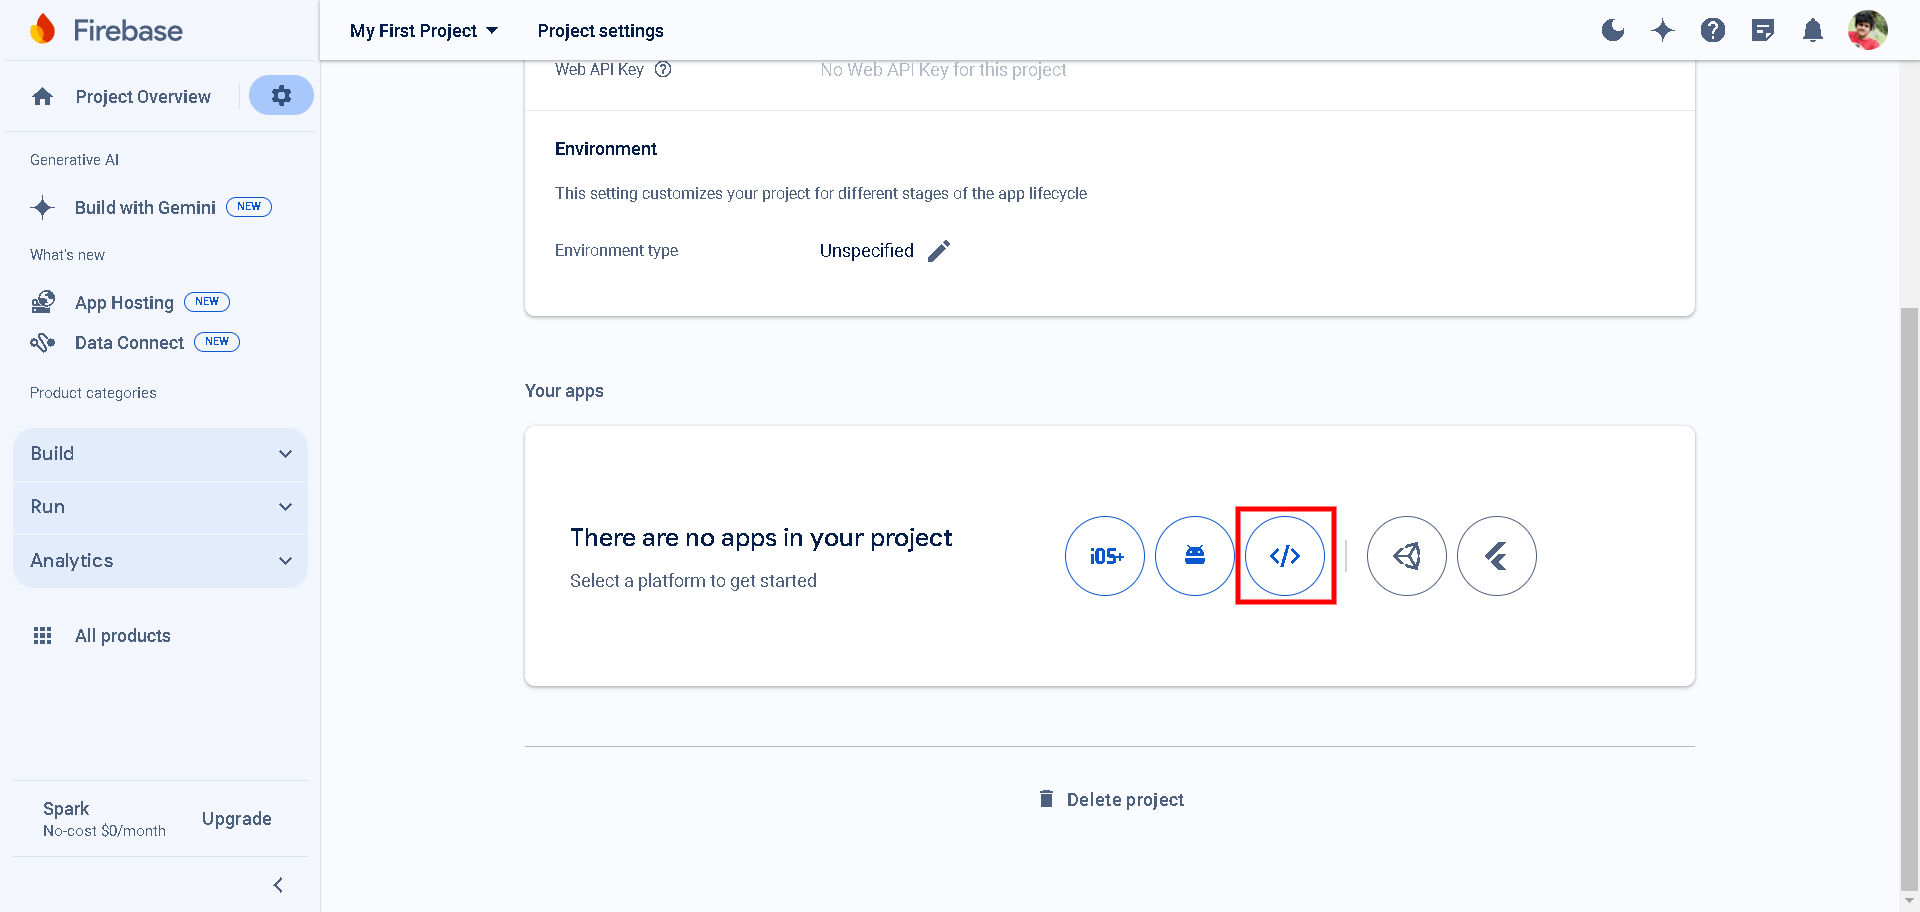
1. In the Firebase Console, click on the gear icon (settings) next to 'Project Overview.'
2. Select 'Project settings.'
3. Scroll down to the 'Your apps' section.
4. Click on the web app icon (</>) to add a new web app.

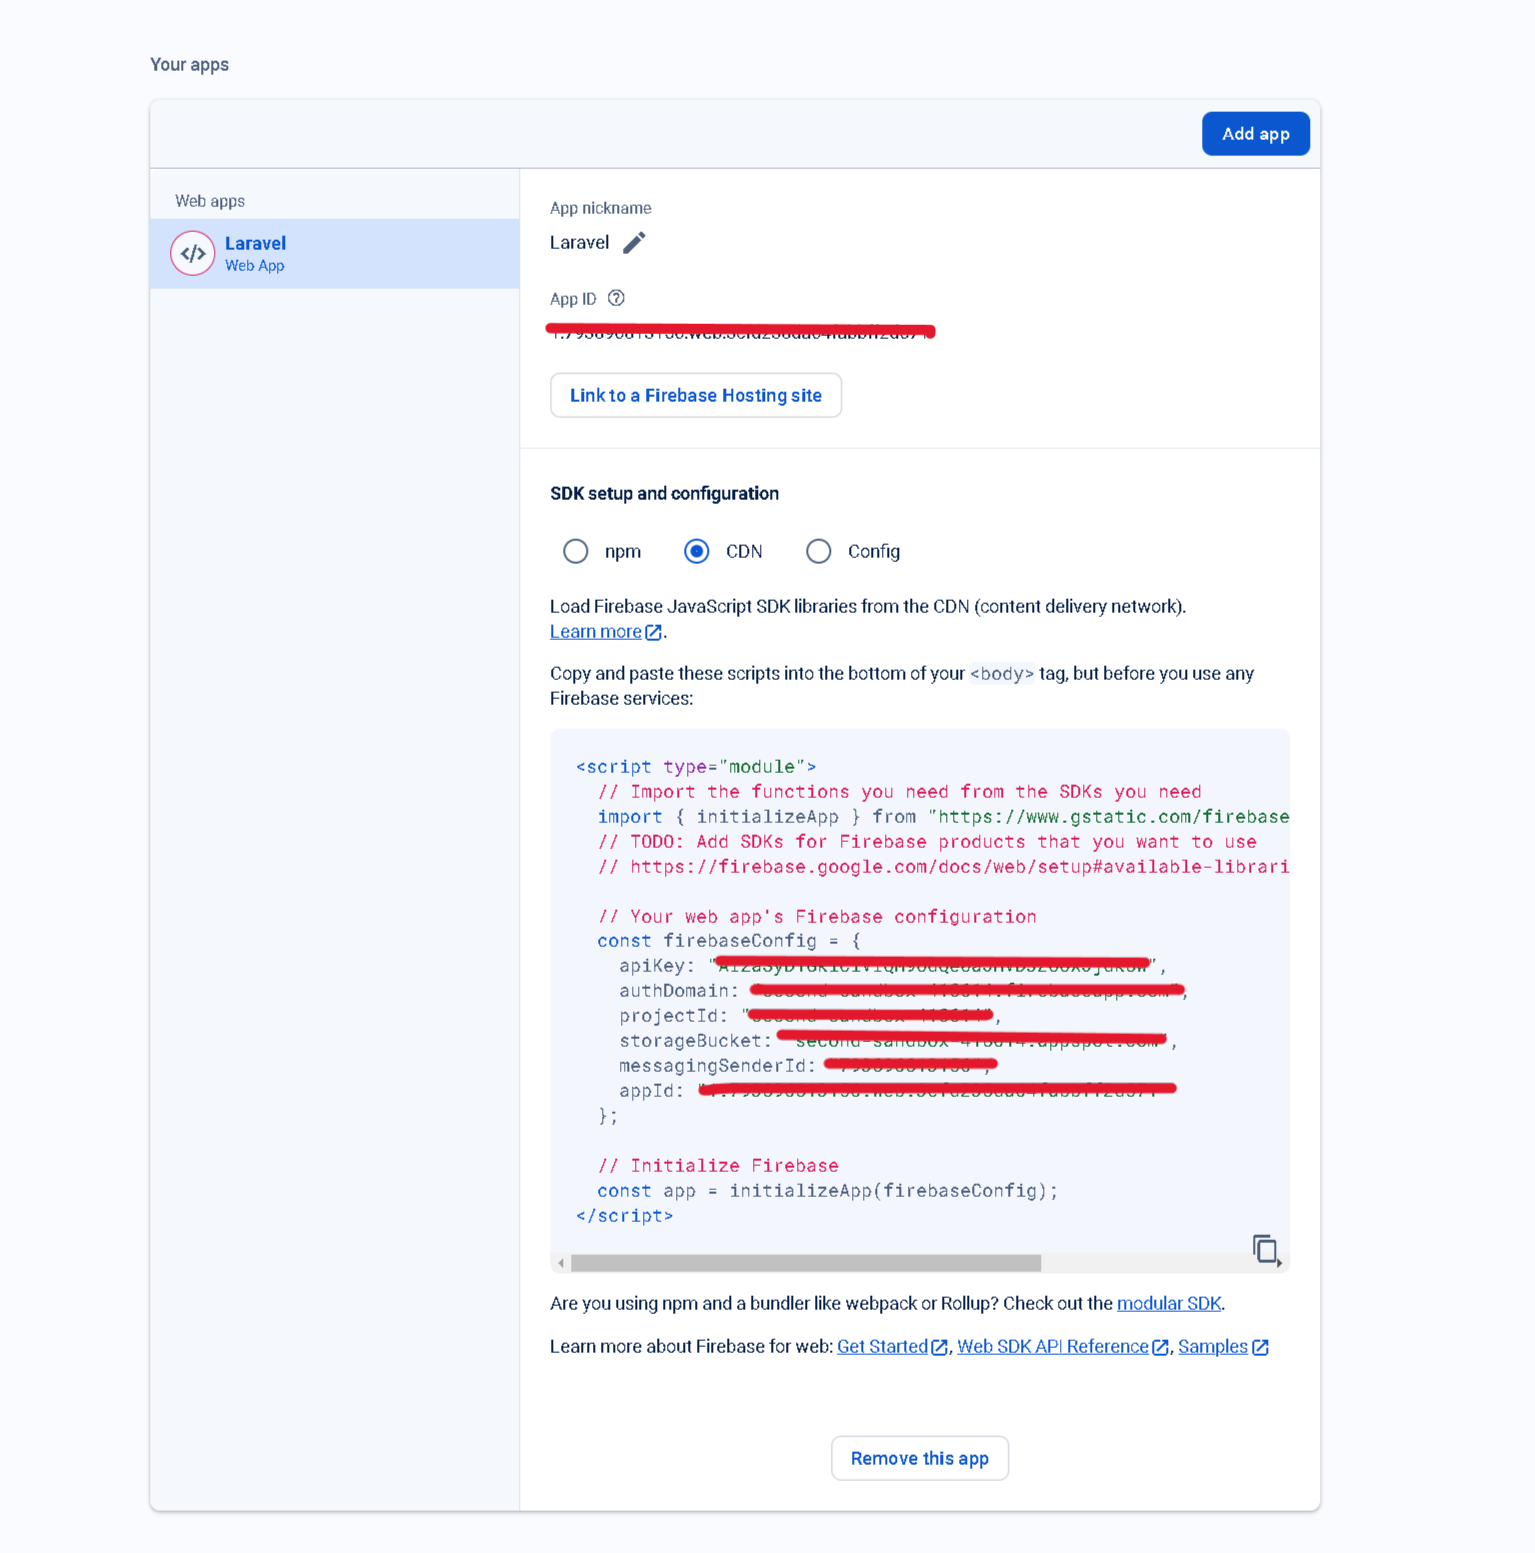
5. Provide an app nickname (e.g., 'Laravel').
6. Click 'Register app.'
7. You'll see a snippet containing the configuration object. It looks like this:

- Get the Service Account Json File:
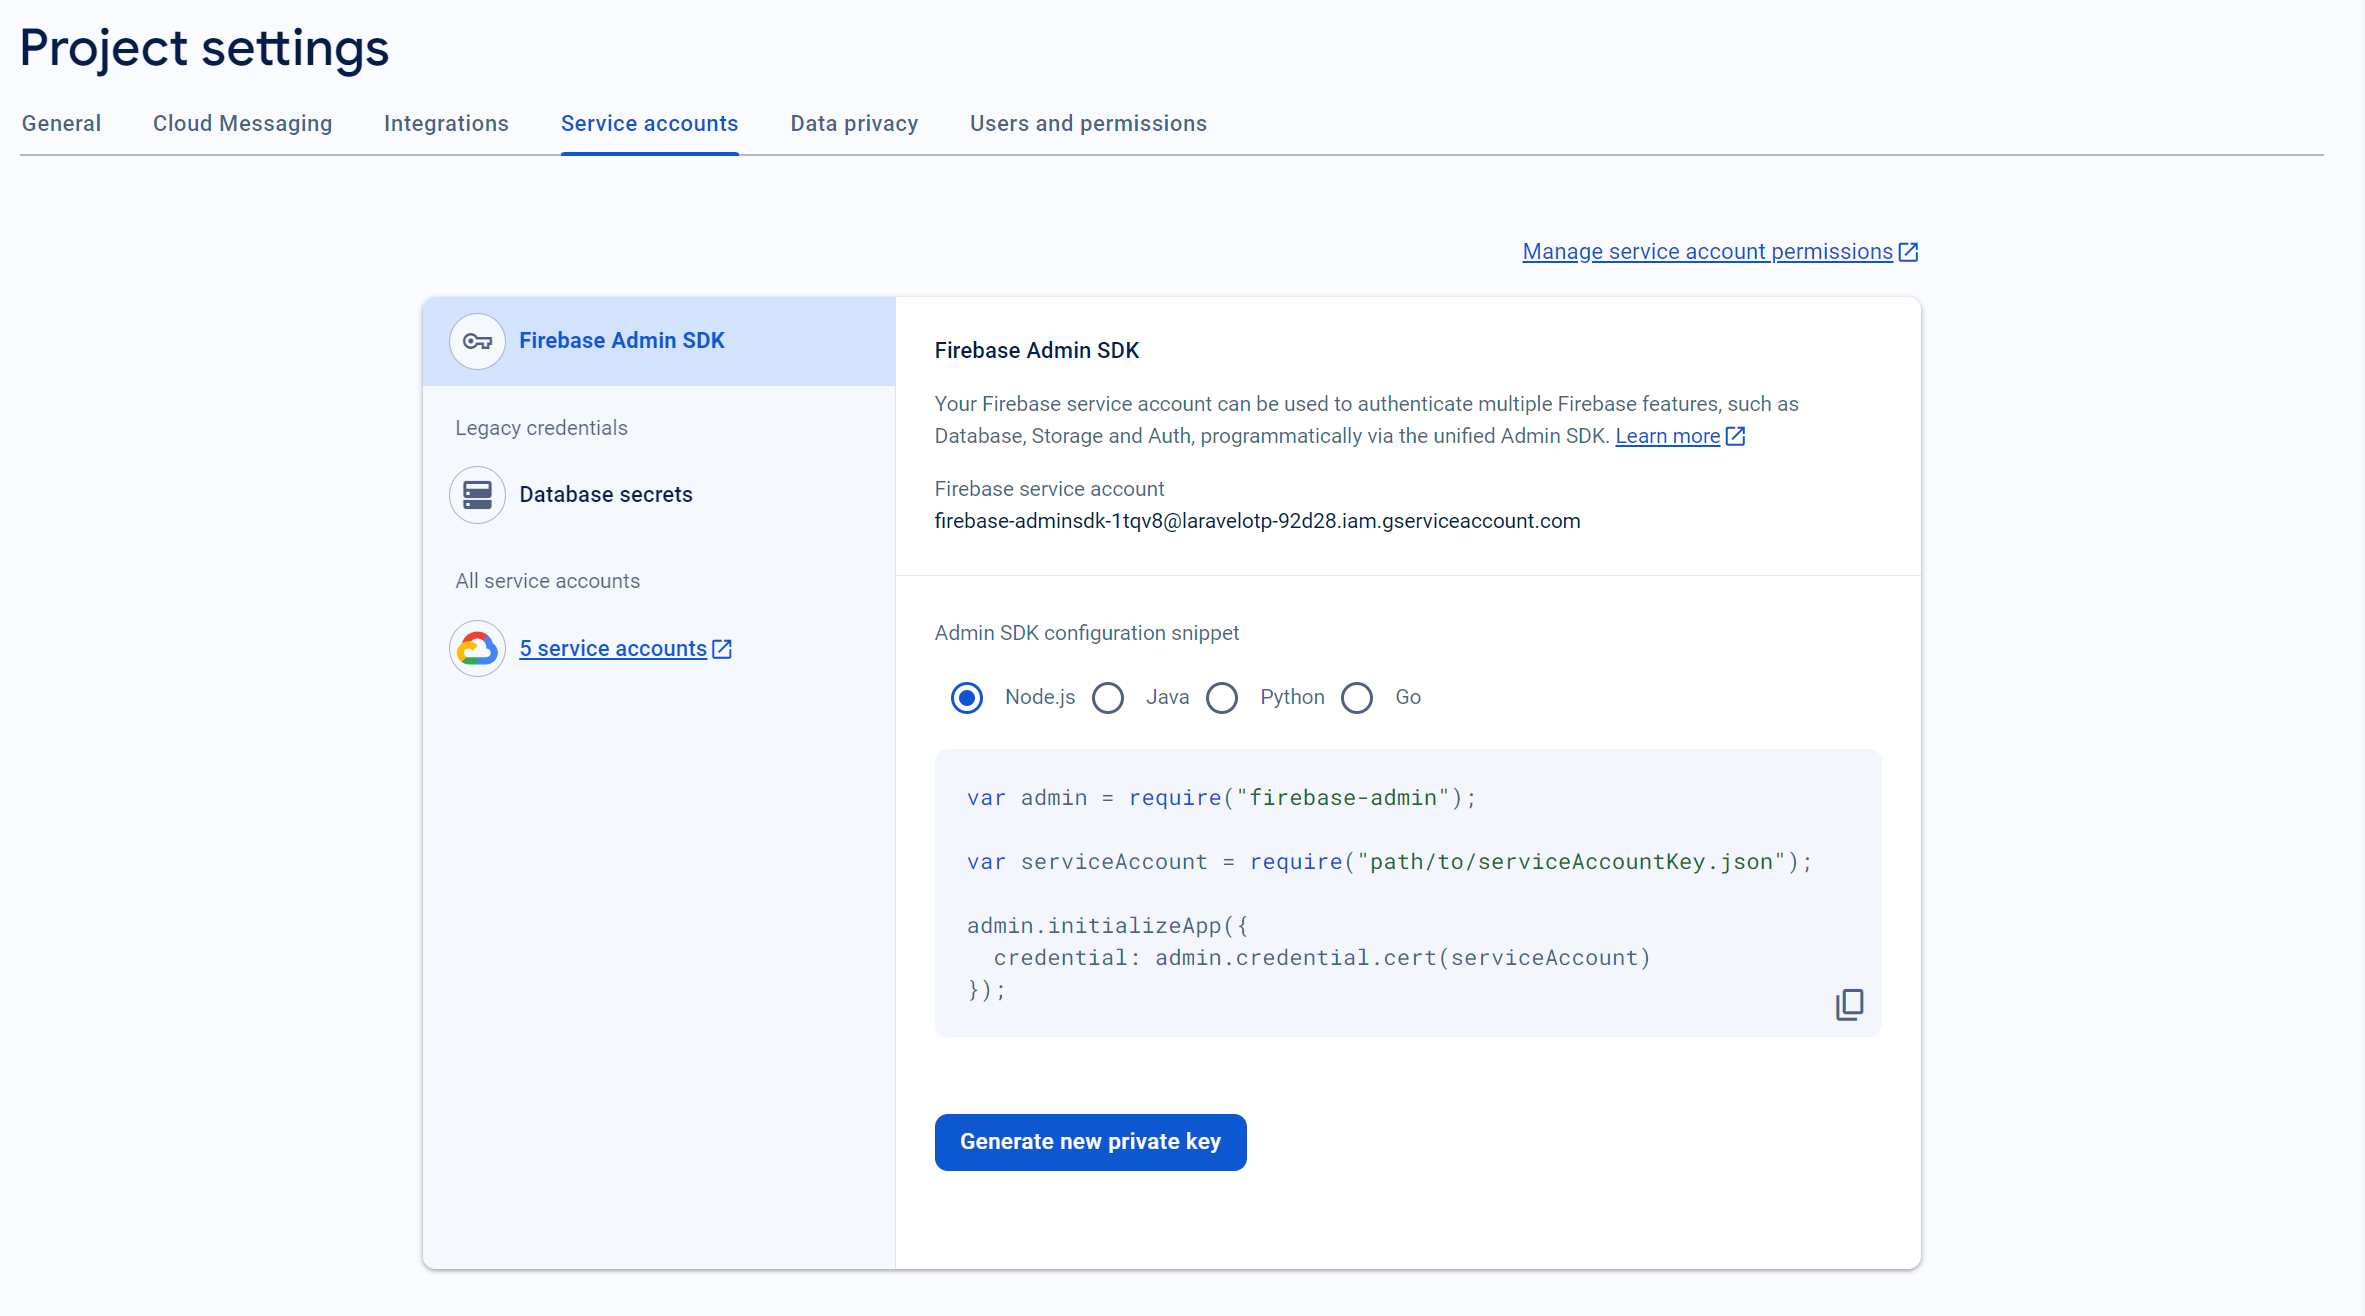
1. In the Firebase Console, click on the gear icon (settings) next to 'Project Overview.'
2. Select 'Project settings.'
3. Click on 'Service accounts'
4. Click on 'Generate new private key' button and it will download a json file.

You can now use Firebase services like Firestore, Realtime Database, Authentication, Storage, and more in your web app.
Remember to keep your configuration files secure and avoid sharing it publicly. It contains sensitive information related to your Firebase project.